Quantcast
Channel: Neil Parkhurst's Groups Activities
Viewing all 1692 articles
Browse latest View live

MB-200: Microsoft Dynamics 365 Customer Engagement Core – Email Templates

$
0
0

I am creating a series of blog posts that collectively are designed to help anyone preparing for the Microsoft Dynamics 365 Customer Engagement Core exam. (aka MB-200) In this post I will look at concepts around email templates.

You can see below that we have a section of the exam which covers the user experience. Within this section needing to know how to create email templates is referenced.


Email templates allow us to quickly create standardised messages. These are often used for common messages including welcome messages, order confirmations, thank you messages etc. The messages can be personalised automatically by “injecting” dynamic data. Additionally email engagement now allows us to identify the “best” templates based on reply rates, open rates and count of sends.

Using Templates

Out of the box we have a number of email templates that can be leveraged, additionally users and developers can also create templates. (I will describe that process in a second!) First, let’s look at how to create an email from a template.

Below you can see that I have created an email and made it “to” a contact and “regarding” an opportunity. Next I have selected the “INSERT TEMPLATE” option from the ribbon bar. Or you can use the insert template icon in the common bar on the email body.

In my example I have deliberately set the “to” and “regarding” fields to different entities. This has been to show that the system will prompt me to ask which entity to use for locating possible templates. Some templates can be global to all entities but some will contain dynamic content associated with a specific entity type.


Having selected my entity a second dialog shows to allow me to search and select a template.

Tip: I found it useful to use the “change view” option to help me find the correct email templates!


Below you can see the resulting email. Notice that the email subject and description has been pre-populated for me.

Note:
Attachments can also be automatically added to an email using this process. (Although the email must be saved prior to selecting a template that includes attachments.) I have found this feature really useful for creating “welcome” emails, when I might want to always attach a set of my terms of conditions and other information useful to new customers.


Note:
If you try to apply a template that does contain attachments and the email hasn’t been saved you will receive a warning error message. (Shown below.)


Incidentally, it is also possible to define an email signature in Dynamics 365. If you have a default signature and create an email …. Adding the template will insert the template prior to the signature. Meaning both concepts can be used in tandem.


Out of the Box Templates

Out of the box Dynamics 365 includes many templates. In the advanced settings area of Dynamics 365 you will find a templates option. And within this you can access the “Email Templates” option.


Within this area you can see all of the system templates. The template type shows the entity which applies to each template. Also notice that the reply rate, open rate and sent count are shown in this view.


System Templates

I won’t cover the actual maintenance of email templates in great detail. (It is best for you to simple create some test templates to learn this!)

But you should be aware that system customizers and administrators can create and amend system wide email templates. These templates can be made part of a Dynamics 365 solution and can therefore be migrated from one environment to another. (Say from your development sandbox into production.)

You can see below that within “make.powerapps.com” I can use the “new” option to add email templates into my solution.


When creating a new template you will be prompted to confirm if it should be globally available or applied to a specific entity.


Once you have selected an entity it is possible to use the “Insert/Update” option to add any field from that entity into the template. This is how developers can add personalised / dynamic content into the email template.

Note:
You can also pick fields from the system user record of the person creating the email and also any entity directly related to the parent entity the email is based on.


Creating Templates (Personal)

In almost exactly the same way as developers, users can add their own personal templates. Using the “Personal Options Cog” icon, each user can access their personal options. Within this area they have an email templates tab which allows then to create personal templates. These personal templates then show alongside the out of the box system templates and any additional ones your administrators may have created.


You may need to be aware that the system administrator can enable / restrict individual users from creating personal email templates. (I can think of circumstances when the management might want to restrict some users from creating their own templates!)


Hopefully in this quick post I have given you a good overview of the capabilities of email templates. As always I encourage you to include plenty of hands on time in your exam preparation, don’t just reply on theory. Create some actual templates and test out how they behave. Enjoy.


Installing The USD Accelerator

$
0
0

Recently a few people have asked me questions about how to install The USD Accelerator, so I have produced a video showing a typical install process.

The USD Accelerator is my free to download USD configuration aimed at helping people get up and running with Unified Service Desk as quickly as possible. You can find out all about The USD Accelerator here.

As you will see in this video by following four simple steps you can have Unified Service Desk and The USD Accelerator up and running really quickly ….

D365UG Birmingham – 4th Dec 2019

$
0
0

I can’t believe we are entering the final few weeks of 2019 …. We’ve had a great year at D365UG Birmingham! We’ve hosted events this year including many fantastic topics, such as Dynamics 365 Marketing, Portals, PowerBI, Omnichannel and also talked loads about new “CRM” features.

We plan to close the year by going on a mission to help widen our knowledge of Dynamics 365. So, we have three sessions this time with the overall topic of learning something new about the other parts of the Dynamics 365 ecosystem – that’s right, there is life outside “CRM”!! Honest!!

We know it’s important for many of you to have a working knowledge of the Dynamics 365 apps and technologies that surround Dynamics 365 Customer Engagement and so, to that end, we have three sessions on different areas of the Dynamics 365 world:

@James Glover will be giving us an introduction to Dynamics 365 Business Central.

@Adil Aslam will show us Dynamics 365 Talent to give you an insight into this product (that Microsoft themselves use to manage 100,000 job interviews per year!)

@Oli Ward from Microsoft will be showing us some awesome tech in Dynamics 365 Customer Insights.

Plus we’ll have all the usual networking opportunties and our famous free buffet. And as its almost Christmas, maybe you’d like to join us for a drink afterwards!

I’m genuinely looking forward to December 4th…. I think I’m going to learn more cool facts this time  than at any other event this year. It really shouldn’t be missed. I suggest you register now to avoid delay.


Date: Thursday 4th December 2019

Start time: 6:30pm

Location: Wesleyan Building, Colmore Circus, Queensway, Birmingham, B4 6AR

You can register now on D365UG here.

Or on meetup here.

Omnichannel for Customer Service – Masking Data

$
0
0

I have recently been experimenting with Microsoft’s new Omnichannel for Customer Service. This fantastic tool gives us webchat (and much more) within Dynamics 365. One really useful feature is the ability to “mask” data. In this post I will explain this feature.

Imagine your contact centre agents are chatting with customers using Omnichannel for Customer Service, in these regulated times you may find compliance rules exist around the storage of sensitive information such as credit card numbers. You will probably have rules around not storing this information.

It is probably true that you won’t want to collect sensitive information like credit card numbers via web chat. But I have still had a requirement around this! My customer has found that whilst you don’t want to collect sensitive data in web chat you can’t control what the customer says. And if customers happen to supply sensitive information this creates an admin task to firstly spot this and secondly remove this data. It would be much better to stop this data being captured in the first place!

Another requirement for data masking might be removing abusive comments from customers. Not all customers are nice people! Some may feel it is appropriate to vent their frustrations and might swear at your hard working agents. Wouldn’t it be great if you could detect certain keywords and simply remove them from chat transcipts?

Omnichannel for Customer service allows data matching patterns to be masked. Lets look at how;

Step One – Create some masking patterns

If you open the Omnichannel Administration app, you should be able to find a “Data Masking Settings” option within the Settings area.

In here you can create, edit and test your masking rules.

Out of the box will find three example masking rules. Credit cards, emails and Social Security Numbers (SSN).

Tip:
Whilst I did have three example rules they were all inactive by default. Meaning to enable the rules I needed to activate them.

FYI: I believe there is currently a limit of 10 masking rules.

I decided to complete a simple test by creating a rule for myself from scratch. So I decided to work out how I would create a rule to mask all of the “bad” words a customer might say.

You can see below that I clicked “new” and then created a regular expression to match against. (ok, my words aren’t that bad but you didn’t want me to say #### or ####!!)

A regular expression is essentially the JavaScript pattern to apply to text being entered into the chat window. They might look slightly technical but they aren’t that hard. You can find out more about regular expressions here.

My expression is simply looking for anyone of a list of words. Including offensive phrases like “Poo” and “bottom”.

Step Two – Test

Having created my mask wanted to test it. You can do that right on the masking rule form. You can see below that I have typed a phrase in the “enter test data” field.

Notice that the test result return a “#” character in place of anything that matched the rule. But did allow anything not in my phrase. (Such as the word “is” below.)

Step Three – Wait

I needed to wait! Changes in the omnichannel administration can take 15 minutes to take effect. Actually in my example I had to wait a little longer than that. So be patient and give the magic plenty of time to happen.

End Result

Now when I customers chat with me the masking rules are applied. You can see the chat window my customer would be using below, this customer decided to volunteer their credit card number. But the matching rules spotted this and replaced it with “#” characters.

Tip: Actually I found that the out of the rule worked but if I added spaces then it didn’t mask the number. So maybe you’d want to create an extra rule with spaces!

Back in Dynamics you can see that the agent also only sees #. Importantly if you look at the chat transcript after finishing the conversation that also only shows the “#” character. So none of this data has been passed to the agent or stored in the database. And therefore any compliance requirements should have been satisfied.

Next I tested the reverse. What if my agent said something inappropriate to the customer?? Well below you can see that the customer’s comments have “#” as their abuse is masked. But what the agent says is not filtered in this way.

I guess it is ok for the agent to swear at the customer! (Or maybe we are assuming agents are well trained and would never do such a thing!)


Something I spotted was that the sentiment analysis isn’t effected by the masking. The customer might make some REALLY negative comments but if the words are masked any sentiment analysis does not get applied. So phrases like “You ###in ####” but not register as negative sentiment. I guess this makes sense as the masking has stopped the data being stored therefore it isn’t available for sentiment analysis.

One limitation is that currently we can only use the “#” character as the mask character. The field to change the character is read-only. But as the field exists maybe this suggests we’ll be able to change it in the future.

This is a simple feature but one that I’ve found interesting and useful. If you are using Omnichannel for Customer Service I hope you do also. If not #### ###!!

MB 200: Microsoft Dynamics 365 Customer Engagement Core – OneNote Integration

$
0
0

I am creating a series of blog posts that collectively are designed to help anyone preparing for the Microsoft Dynamics 365 Customer Engagement Core exam. (aka MB-200) In this post I will look at concepts around OneNote integration.

You can see below that we have a section of the exam which covers implementing integrations, within that we have a section regarding Office 365 and OneNote.

I guess the first question might be, what is OneNote? (Although I hope you know the answer!) OneNote, as the name suggests is a product for taking notes. It is part of the office suite available in Office 365. Notes can be simple items of text but could also involve screen shots, audio or even video that relate to whatever subject is being covered. Meaning that OneNote offers a much richer interface than available within standard Dynamics 365 note taking. OneNote also supports co-authoring, allowing multiple people to collaborate on a single “document”. OneNote has a variety of clients to install locally, run on-line and even as apps on mobile devices.

OneNote uses a concept of notebooks, each notebook can have sections and pages, Just like a real notebook!

Note: OneNote also has a concept of section groups but this is currently not supported by the Dynamics 365 integration. Meaning you should only use sections and pages when integrating with Dynamics 365.

You can then create and collaborate on OneNote documents using any of the supported clients. Maybe think of OneNote as an extension to the note taking capabilities in Dynamics 365 rather than a replacement.

From the Timeline in Dynamics 365 it is possible to open OneNote notebooks in the context of the currently selected record. You do this from the “+” icon. Clicking the OneNote option will create a new notebook for this record. Or alternatively if a notebook already exists it will be opened.

Tip: If you are familiar with the classic web interface for Dynamics 365 you may be aware that a separate tab used to show for OneNote in the social pane. (As shown below.) This older approach has been replaced in the new Unified Interface!

OneNote integration uses SharePoint to store the notebooks. Because of this OneNote integration options can be found in the document management area of advanced settings in Dynamics 365.

Prior to enabling OneNote integration each entity requiring the OneNote functionality must also already be enabled for document integration.


An alternative approach to enable OneNote integration is to navigate to the entity in customizations and enable in the communication & collaboration section.

Note: I have shown the classic approach to customizations below. The OneNote integration property is not currently accessible in the newer make.powerapps.com interface.


If a OneNote doesn’t exist one is automatically created in SharePoint. Each record in Dynamics 365 will have only one notebook, which is shared across all users. (Hence the use of SharePoint rather than OneDrive for Business!)

Clicking on the OneNote option in the Timeline will create a new notebook or open an existing one..

If you review the documents option on the entity you will be able to see the file(s) that makeup the OneNote being stored in SharePoint. (You access the “documents” option from the Related option!)

This illustrates that SharePoint is required prior to integrating with OneNote. Also you should be able to see that the OneNote could be opened directly from SharePoint without opening Dynamics 365 if required.

If you remove a Dynamics 365 record the associated OneNote notebook will not be removed from SharePoint. You’d need to remove the notebook manually from SharePoint.

By default, Dynamics will create a separate document location and a separate OneNote notebook for each record viewed. Should you wish to share one notebook across multiple entities this can be achieved by manually editing the document location so that it points to one shared OneNote notebook location.

As with SharePoint integration you need to be aware that Dynamics 365 access and SharePoint access (and therefore OneNote) are not directly linked. Permissions will need to be granted in the Dynamics 365 security model and SharePoint independently. You need to ensure users have access to both Dynamics 365 and SharePoint.

It is also worth understanding that SharePoint and OneNote configuration does not form part of the Dynamics 365 solution file. When moving from development to production environments any configuration will need to be repeated in both environments.

In this post I hope I have covered all of the major points needed for the MB 200 certification. But as always I strongly encourage you to gain some real world hands on experience.


Omnichannel for Customer Service – Chat Transcripts

$
0
0

Microsoft’s new “Omnichannel for Customer Service” adds powerful webchat capabilities into Dynamics 365. I’ve been experimenting with some of its latest features…. In this post I’ll explain how visitors to your website can access their chat transcripts.

I have often had a requirement for the customer to be able to access a copy of a chat transcript at the end of a conversation. Each chat solution may address this requirement slightly differently, so how does Omnichannel for Customer Service meet this challenge??

The answer is “very well”. (In my opinion.) As we can tailor if customers can access transcript and also if that is via a download option, an email option or both.

I do like the flexibility to provide two different approaches to obtaining copies of transcripts, as I can see advantages in both. The download option is simple and instant. Email might be considered slightly more involved but it has an advantage! With an email message you’ll have a record of what information has been sent to which customers. I can imagine that might be important in some scenarios. Additionally you could format the email message to include additional marketing information or maybe link to a FormPro survey etc. So, in my opinion, the email approach opens up some interesting possibilities.

Enable Transcripts

When we define the chat channel in Omnichannel for Customer Service a couple of options now exist to control access to transcripts. Below I have opened the “Omnichannel Administration” app and under channels opened one of my chat channels.

You can see that I have two options. Both enabled in my example! “Allow download of transcript” and “Allow email of transcript”.

If you select the allow email of transcript option two further fields appear. One is the template to use for sending emails. (A default is offered but you could easily alter or copy this to add you own additional messaging / branding.) The second field is the mailbox to use for sending emails. Meaning all emailed transcripts for a particular chat widget will be from the same source.

Below you can see that I have opened advanced settings and within the templates area displayed the default email template provided. “Conversation transcript email template”.

The template looks quite complicated! But actually I don’t think it would be that hard to tweak this html to include some personalized branding etc.


Email Setup

If you wish to send email messages there are a few things you might need to check before the messages will operate as expected. I mention them here partly as when I initially tested this option I’d missed making sure these were set correctly!

Firstly you are going to need to ensure that the mailbox is approved and tested correctly. (Hopefully you’ll already be aware of this if you are familiar with Dynamics 365!) Below you can see that I have opened advanced settings. I have then navigated to “Email Configuration” and mailboxes. You will need to ensure that the required mailbox has first been approved by an administrator and then the “Test & Enable” option has been run. Assuming your test is successful you’ll be looking for a green tick and a success status on outgoing emails.

As all the transcript emails will be sent from one generic email address effectively others will be sending emails from this account. Meaning there is a personal option that also has to be set for this mailbox!

Access the personal options for the account linked to the mailbox you wish to send as. This is done from the cog icon. (As shown below.)

Next in the email tab check that the option to allow other users to send emails on your behalf is ticked. By default this will not be selected. So you will need to remember to set this option!

User Experience

Having configured chat transcripts visitors to your website will see two new options in their chat widget. (As shown below.)

Customer’s can use these icons to download or email transcripts as required. (Obviously they may only have one icon if you only enable one approach!)

Below you can see that at the end of a chat the customer will be prompted to use the download options. They could obviously click the icons at any point in the conversation but a reminder at the end of the conversation is useful.

If the select the download icon then the chat will simply be downloaded to their download directory.

Clicking the email option would prompt for an email account. That would be defaulted if they entered an email address in the pre-chat survey.

After clicking send and waiting a few seconds an email will be received by the customer. I have shown an example email below. This has been created using the out of the box template with no changes. Hopefully you can see adding a company logo and maybe some other additional information may be useful.

I hope you agree that this chat transcript function is just one more great feature of Omnichannel for Customer Service. I hope you also enjoy experimenting with it!

Omnichannel for Customer Service – Entities

$
0
0

Recently I gave a presentation regarding Omnichannel for Customer Service at 365 Saturday in Paris, afterwards I was asked a question about the files customers might send in webchat conversations. In this scenario a large volume of attachments were expected and these would need to be managed. Therefore they wanted to know where the attachments were stored. In this post I hope to answer that question and more!

After the event my flight back to Birmingham was delayed … meaning, thanks to “flybe” I had some unexpected spare time!

Whilst waiting for my plane I experimented with how attachments are stored. In the end my flight was delayed for longer than I expected …. so I also investigated other data relationships connected with Omnichannel for Customer Service. In this post I will answer the original question and give some additional insight into the entities behind Omnichannel for Customer Service.

So lets start with my original question “How are attachments stored from webchat conversations?“.

Within The Omnichannel Administration app we can define if file attachments are required. And if these can be sent by customers and / or agents.

I think the person speaking to me in Paris was right to ask a question about this! As in some scenarios customers might routinely send multiple pictures of issues. This could quickly consume large amounts of disk, so knowing the location of the attachments would allow us to monitor storage and delete the images after a period of time. (or maybe move them into a cheaper storage location.)

Below you can see a screen shot from my Omnichannel Administration app, this shows how I’ve configured the chat to allow file attachments to be sent by the customers and agents.

The simple answer to the original question is that a note is created regarding the conversation with the customer. This note will have an attachment that contains the file sent by the customer or the agent. I guess it would be a pretty simple task to create a bulk deletion job to remove all notes linked to conversations older than “n” weeks or months.

If you don’t know, within Omnichannel for Customer Service we have an entity called “conversation”. Its schema name has the more catchy name of “msdyn_ocworkitem”. After each chat is completed a conversation record will be created and this will link to other information. For example, the files transferred as part of a conversation.

But I also spotted additional notes being created! So whilst waiting for my delayed plane I started to dig a little deeper. Another entity called transcript is also linked to the conversation entity. Each transcript entity will have a note which contains an attachment called “message.txt”. This txt file contains some JSON which in turn holds the content (transcript) from my conversations. Knowing this exists and that you could therefore access the content of the conversations might be very useful.

Incidentally when I looked at the JSON it also contains the GUID of the note containing the attachment from my conversation. Meaning my transcript and any attachments are indirectly linked via this GUID.

Tip: You might also want to consider when to run a bulk delete against the notes containing conversation transcripts. Do you really want to store all the text from all your webchat conversations indefinitely!

With my delay worsening I bought a notepad and pen from a trusty airport stationery shop. I then completed multiple webchats and started to scribble details for any other entities that had been updated. You can see my carefully crafted and completely illegible notes below!

Obviously these scribbles were hard to understand and I’d quickly forget what they meant! So this morning I created a version of them using Visio, as a result I hope the diagram below will make a little more sense.

In addition to looking at how notes are used in connection with conversations I also investigated ongoing conversations, sessions, sentiment analysis and characteristics (skills).

Importantly: I never set out to document all of the entities / fields connected with omnichannel conversations! But I did end up reviewing more than I expected! So this post shouldn’t be considered a complete picture but will still hopefully give you some useful insights into how omnichannel conversations are stored.

Ongoing Conversations
– the ongoing conversations entity (msdyn_liveconversation) holds details for the current active conversations. Including the status of the conversation, when it started, current active agent and sentiment. I believe knowing this could be really useful if you wanted to report on the number of current conversations or maybe trigger alerts when very negative conversations happen.

Sessions
– Each session is linked to one or more conversations. Often you will have just one session record and one conversation. But if the same conversation is opened and closed multiple sessions will exist. Sessions might be really useful as they link to another entity called session participants. The participants being the agents that were involved in that part of the conversation. Sessions could be complex! For example, Agent one might start the conversation, then consult agent two about the issue and finally transfer to agent three. And whilst this is happening a supervisor might monitor the chat. All of this complex process could be reviewed via the sessions entity.

Sentiment Analysis
– We have a conversation sentiment entity but additionally optionsets on other entities also highlight sentiment information. For example, it might be useful to know that the current sentiment of a live conversation is held in the ongoing conversation entity!

Characteristics (aka skills)
– skills based routing has been recently added to Omnichannel for Customer Service. We can define skills for agents and workstreams. This information is then used to match the best agents to the right incoming conversations. We also have a number of entities that record which sessions and conversations involved what skills. You might find this useful for reporting, as you could ask questions like “which conversations have happened that needed agents with xyz skill”.

Below are my rough notes for each entity; (Again this shouldn’t be considered complete documentation, these notes are just some pointers!)

ItemDetails
EntityOngoing Conversation
Schema Namemsdyn_liveconversation
High level purposeIncludes records for all currently active conversations, records get created as incoming chats arrive.
Lookups to other entitiesWorkstream

Queue

Active Agent

Customer

CommentsAfter a conversation ends the live conversation record will be deleted.

Includes an optionset called Customer sentiment (msdyn_customersentimentlabel) which hold current sentiment. (Values include “Very negative”, “Neutral”, “Slightly Positive” etc.

Status reason can be open, active, waiting, closed or wrap-up.

ItemDetails
EntitySession
Schema Namemsdyn_ocsession
High level purposeHolds a history of conversations and links to participants, create on completion of a session
Lookups to other entitiesQueue

Conversation

CommentsEach Session can have multiple Session Participants (See session participants for details)
ItemDetails
EntitySession Participants
Schema Namemsdyn_sessionparticipant
High level purposeLists the participants in a conversation, shows when agents joined the conversation. (Or supervisors monitored the conversation)
Lookups to other entitiesSession

Agent

CommentsMode field options include primary, consult and monitor (Shows the “role” the agent took in the conversation)

Date time fields show when agent joined, left or was added into the session

ItemDetails
EntitySession Characteristics
Schema Namemsdyn_sessioncharacteristics
High level purposeLinks the session to conversation characteristics (aka skills related to the conversation)
Lookups to other entitiesSession

Conversation Characteristic

CommentsThis entity does not contain the skill / rating! Instead it links the session to the conversation characteristic which will have the skills.
ItemDetails
EntityConversation
Schema Namemsdyn_ocliveworkitem
High level purposePrimary record for the conversation. Each conversation can be related to multiple sessions (As a conversation could be closed and opened again in a new session)
Lookups to other entitiesWorkstream

Queue

Active Agent

Customer

CommentsNotes regarding the conversation will exist for any attachments passed between the agent / customer.

Includes an optionset called Customer sentiment (msdyn_customersentimentlabel) which hold current sentiment. (Values include “Very negative”, “Neutral”, “Slightly Positive” etc.

ItemDetails
EntityConversation Characteristic
Schema Namemsdyn_ocliveworkitemcharacteristic
High level purposeShows the skills associated with a conversation and the skill rating.
Lookups to other entitiesConversation

Characteristic

Rating Value

Comments
ItemDetails
EntityConversation Sentiment
Schema Namemsdyn_ocliveworkitemsentiment
High level purposeHolds the sentiment details for a conversation.
Lookups to other entitiesConversation
CommentsContains sentiment pulse and transition scores.

Contains text field (msdyn_sentimentzone) to state if conversation was negative, positive etc.

ItemDetails
EntityTranscript
Schema Namemsdyn_transcript
High level purposeLinks conversation to a transcript of conversation, created at end of webchat conversation.
Lookups to other entitiesConversation
CommentsHas a note containing an attachment called “message.txt”.

The message.txt contains a JSON with all content from the conversation.

If the conversation included sending / receiving an attachment “message.txt” will include the GUID of a note containing the attachment. However the note for the attachment will actually be regarding the conversation.

In the end my flight left Paris and my “work” was cut short. Hence this post only covers a partial picture of the Omnichannel for Customer Service entities. I guess there will be more I could learn by digging even further …. maybe I’ll use Ryanair next time and “pray” for an even longer delay!!

Note: Other unreliable budget airlines are available!!

Until my next delayed flight I hope this information answers the question I was set and offers a few extra pointers!

MB 600: Microsoft Dynamics 365 + Power Platform Solution Architect – Lead design process (Part Three)

$
0
0

I am currently preparing to take the Microsoft Dynamics 365 + Power Platform Solution Architect certification. Or “MB 600” for short! As I prepare I plan to write revision notes in this post I will cover leading the design process.

A Dynamics 365 / Power Platform Solution architect needs to lead successful implementations, meaning the architect is a key member of the project team. They must demonstrate functional and technical knowledge of Power Platform and Dynamics 365 apps. And beyond that they must appreciate other related technologies that form part of the overall architecture.

This section of the exam is pretty large! I therefore plan to split this information into three posts. These being the third post of three.

In this post I will try to tackle topics under the following headings;

  • Design data migration strategy
  • Partition features into apps
  • Design visualization strategy
  • Design for upgradeability
  • Create functional design documents

Design data migration strategy

The Solution Architect should lead the data model design and alongside that should consider what data should be migrated into the new system.

Data may need to be migrated into Dynamics 365. This maybe a one off task, as data from older systems being replace may need to be imported at the start of the project. Or the migration could be an ongoing task, maybe because you need to synchronise key data attributes between systems.

Tip:
When considering a potential “ongoing” data migration / integration it may be useful to consider if a virtual entity could be used rather than duplicating the data!

Data quality– if you plan to import data from a legacy system you may need to consider data quality. And if any existing data issues need to be handled. For example are the addresses held in the old system adequate. Or are there missing mandatory fields. Or are phone numbers incorrectly formatted.

Duplicates – duplication of data can be a significant issue with “CRM” systems. Do you have large numbers of duplicate leads or contact records. And if so, should these duplicates to resolved prior to migration.

Data retention– Do you really need to import all of the data from the legacy application? Especially as storage is not free! But there might be requirements to keep certain entities for a given period.

Data Transformation– The data in the legacy system may be held in a different format to that required in the new solution. Therefore the process of migration may not be a simple import. Transformation logic maybe need as part of the import.

Tools – what tools will be used to migrate the data. The Power Platform does include out of the box features to import data. But with large complex migrations you may need to consider using 3rd party tools such as KingswaySoft of Scribe.

Partition features into apps

A Dynamics 365 or Power Platform solution is typically made up of one or more apps. Each app will deliver a logical group of functionality. (Be that via a Canvas App or a Model Driven App.)

The Architect should look for logical functional groupings to help partition the features into apps. This might be based on job functions or areas of the business such as “Customer Service”, “Sales”, “Marketing” etc.

Out of the Box Dynamics 365 ships as a number of model-drive apps. When appropriate you can leverage those apps as shipped. For example, I have often implemented the Marketing app with little change. In other circumstances the out of the box app groupings may not fit your organization. Then consider creating a custom app which may include attributes of several out of the box apps. You can read about the model-driven app design here.

One advantage of using an out of the box app is users would see all new updates as they become available. But equally the out of the box apps may include features you don’t need! Composing a custom (new) app does give you complete control over the options the users see but you will have to manually add new “things” as they become available.

The Solution Architect may need to know when to start with a model-driven app, when to implement a canvas app or when a portal may be more appropriate. So understanding the differences could be important! To help I have highlight some features of each below;

Model-Driven AppsCanvas AppsPortals
CDS data drivenNot CDS data driven (Can leverage external data via connectors)CDS data driven
Backoffice / process focusedTask focused appsExternal user focused
Responsive / consistent UIVisual presentation of informationWeb application
User personalizationCustom UIUse model-driven forms and views as framework to surface CDS data
Consistent accessibilityDevice integration (e.g. Camera usage)Can be customized with standard web technologies (HTML, JavaScript, CSS etc.)
User tooling (Excel etc)Basic offline support
Customizing existing first-party appsSharePoint or Teams embedding
Data relationships drive navigation
Automatic security trimming of UI

The decision of which approach to use in your solution may result in a hybrid approach. This isn’t a one size fits all scenario! For example, you may use a model-driven app for your admin functions, a canvas app for the user facing elements and a portal for external access. Therefore one solution may comprise of any combination of app types.

Additionally don’t forget that you can embed Canvas apps into model-driven apps. This might allow the introduction of visuals and connectors into a Model-driven app based solution which might otherwise not be able to leverage these capabilities. But I advise you to remember that “pretty” apps are nice but performant apps receive better user adoption. So carefully considering the best approach for your solution is advised.

When deciding how many apps should be included in your solution or what type of app to use, there are a number of guidelines you may wish to consider. Including;

  • Large monolithic apps should be avoided
  • Too many small apps are jarring to the user if they have to switch context frequently
  • Components can be used by multiple apps, allow composition of apps that target users with specific needs.
  • Offer groups of users targeted mobile apps to save time when away from their desk

Design visualization strategy

Creation of visualizations covering user screens, reports and other insights will be an essential task of the solution architect. This process should be on going. Right from pre-sales into project initiation and beyond into the analysis, design and implementation phases.

Often customers will focus on the user experience. Understanding if the users are always, sometimes or never mobile when influence the UI design.

Wireframes maybe needed to show main forms, dashboards, mobile experiences and other visualizations such as Power BI.

We may need to look for opportunities to use proactive insights or AI in place of a more reactive use of traditional reports and analytics. (Although our designs will also often include traditional reporting mechanisms!)

There are many points to consider when designing visualizations, including;

  • Who will consume the reports? (Are they already Power Platform users?)
  • What data is required?
  • How fresh does the data have to be?
  • What data is required that might be external to our Power Platform / CDS solution?
  • Can existing reporting capabilities or “insights apps” be leveraged or is something custom required?
  • What actions to we expect users to need to take in response to information in reports?
    • Is the action something we can predict or automate?

Reporting could be grouped into three categories. Operations reports, self-service BI and Enterprise BI. Each of these could include the following …

  • Operational reports
    • views,
    • charts
    • dashboards,
    • SSRS reports
    • embedding of Power BI
    • Advanced find,
    • Excel / Word Templates
    • And maybe 3rd party reporting tools.
  • Self-service BI
    • manual exports of data into Excel,
    • Access to Power BI service (with data refreshed from CDS, maybe on a schedule).
  • Enterprise BI
    • the data export service into Azure SQL,
    • Web APIs for data extraction, transformation and loading . (ETL),
    • Azure Data Lake Storage,
    • AI Builder.

Operational reports are typically easy to use, contain current data and can be accessed by most users with standard technical skills. However they will also commonly represent simple visualisations with only basic filtering and a limited access to historic data.

Self-service reports would typically be created by “power users” with more advanced reporting requirements. Often Power BI maybe leverages to allow them to discover, analyze and visualize data. When considering self-service reporting requirements the Solution Architect may need to ensure the required base transactional and reference data is available. Plus any data security concerns are addressed. (For example, within Power BI CDS user security roles and hierarchy are not used.)

Enterprise BI maybe used to reduce the load on operational data, by shifting any “heavy lifting” into Azure Data Lake. Typically enterprise BI may need access to potentially large volumes of historical data.

The AI Builder can provide pre-built models and intelligence you train. It can provide components which can be included directly in Canvas Apps and Power Automate. Or data can be created for use in Model-driven apps. The low-code AI capabilities include;

  • Prediction
    • Binary classification – predict and classify field in CDS.
  • Vision
    • Forms processing – extract structed data from digital paper, PDFs and forms.
    • Object detection – detect objects through camera or image control. (may need training!)
  • Language
    • Text classification – classify, group and categorize any text in CDS

Additionally Microsoft Azure Cognitive services provide a family of AI services and cognitive APIs to help developers build custom intelligence into apps. You can read an overview about Azure Cognitive Services here.

Plus Solution Architects should be aware that Microsoft Azure Machine Learning can allow developers to implement enterprise grade AI scenarios not met by the AI Builder or Cognitive Services. You can read about Azure Machine Learning here.

Design for upgradeability

Maintaining custom code is more expensive that features delivered with simply low-code configurations to out of the box features. Additionally Dynamics 365 and the Power Platform are updated frequently. Therefore the Solution Architect should design solutions which are as easy to maintain as possible and created in such a way that the regular updates do not break the solution. Additionally the Architect should be responsible for ensuring the correct level of documentation is created so that future maintenance is easier.

Pushing the Power Platform beyond its “natural” capabilities and using unsupported customization techniques should be avoided. Using any unsupported approaches always increases your “technical debt” and will no doubt result in a system that is harder to upgrade.

Consistency across customizations is important. As this will aid the future maintainability of a solution. Additionally any custom software extensions should also follow common design principles.

Plus, consistency across the user experience should be maintained. Creating a consistent interface that sticks to the same layout and naming conventions will ultimately create an improved user experience and an application users are happier to use.

Also, consider that some attributes within the Power Platform are hard to change later. One example being the publisher prefix which gets applied to all schema names. We have all seen the odd “new_” name creep into out applications, this should be avoided! Consider carefully how to name entities and fields, as changing schema names later is “difficult”.

Create functional design documents

A functional design will describe how the requirements to be addressed by the solution will be delivered. It is often a formal document used to describe the intended capabilities, appearance and user interactions in detail.

Functional designs can take many forms. In fact most organisations I’ve worked with have had their own templates defining what should be included.

The functional design maybe a single document but equally the design could be expressed as numerous user stories. A single functional requirements document (FRD) often has the advantage that it makes tracking the requirements really easy. If all the requirements are covered by one design document it should be easy to “tick off” that they have all been included. Multiple user stories however tend to aid planning, as each story can be typically be delivered in one iteration or sprint. User stories however can lack the overall detail needed to help illustrate the bigger picture of what is being delivered.

Whatever template / approach you follow  the purpose of the functional specification is to capture what the software needs to do to support a business user. The functional specification could be considered the point at which the business meets IT! As often we’ll see the business users review the functional design to confirm their requirements have been met and also the developers will use the functional design documents as a key input into their technical design.

As with other aspects of the project life cycle, I would expect the Solution Architect to be closely involved with the creation of and review of the functional design. But that does not suggest that they will create the entire design. (Business analysts and other parties may also contribute to the functional design.)

Functional documents will differ from technical specification / detailed design documents are they are based on the business requirements. They should contain details of end-user expectations and will therefore become a basis for the technical designs which will follow. I personally like to think of it like this …. The business requirements define what end result is needed, the functional design defines what will be delivered, the technical designs will define how it will be achieved.

There are potentially (but not always) multiple documents that could be considered as being part of the functional design. You may hear the acronyms BRD, SRS or FRD used …

  • Business requirements document (BRD)– this described the needs we are trying to fulfil by developing this solution.
  • System requirements specification (SRS)– describes the functional requirements (and non-functional requirements) plus any use cases (stories) that the solution must fulfil.
  • Functional requirements document (FRD)– The FRD would be a detailed definition of everything expressed in the BRD and SRS.

Can we unlock Source Campaign in opportunity form

$
0
0

Hello Everyone,

Right now the only way to attach an opportunity to marketing campaign is via the response feature in marketing campaign. However, the problem with that is you have two do two extra steps to create and attach a marketing campaign to an opportunity. Is there way To unlock Source Campaign fields and attach straight from new opportunity form? Instead of going to marketing campaign. Thank you very much

MB 600: Microsoft Dynamics 365 + Power Platform Solution Architect – Design data and security model (Part One)

$
0
0

I am currently preparing to take the Microsoft Dynamics 365 + Power Platform Solution Architect certification. Or “MB 600” for short! As I prepare I plan to write revision notes in this post I will cover topics around designing the data and security models.

Data is a big topic! I therefore plan to split this information into two post. In this first post I will cover an overview of security and data design.

Note: Microsoft have recently updated some of their terminology. Therefore we should consider the terms like CDS and Dataverse as interchangeable. In terms of the exam I would expect them to begin using the term DataVerse at some point but that change is unlikely to be immediate. Meaning in the short term either term could be used. I created this blog post before the revised terms were announced. I have tried to apply updates but a few “outdated” references may still exist!


Security Overview

As a Solution Architect we need to consider if there are any security, regulatory or compliance requirements that will impact the solution design. Unfortunately, I have often seen security handled as an afterthought but the Solution Architect should consider security throughout the entire application lifecycle. From design and implementation to deployment and even ongoing into operations.

A discovery phase should review / document existing security measures. This is because a single project is unlikely to change the entire approach to authentication. You should understanding if single sign is already in place. Or fi the customer is using 3rd part authentication products or “just” Azure active directory. And if multi-factor authentication is in place.

It is also important to consider how the organizations structure may influence security models. To give just one example, I once worked with a large insurance company. For them it was critical that the data held by insurance brokers was kept isolated from records held by the insurance underwriting teams. These types of organizational structural requirements could lead the Architect to conclude multiple business units, environments or even tenants are required.

The Architect may need to review / design multiple layers of security. Including;

  1. Azure AD conditional access– blocking / granting system access based on user groups, devices or location.
  2. Environment roles– include user and admin roles (such as global admin). You can read about 365 admin roles here,
  3. Resource permissions for apps, flows, custom connectors etc.
  4. Dataverse (aka CDS) security roles– control access to entities and features within the Dataverse environment.
  5. Restrictions to the 300+ Dataverse connectors– data loss prevention polices (DLP) used to enforce how connectors are used.

You can read about restricting access here.

Security Groups

Within the Power Platform admin center we can optionally associate a Dataverse environment with a security group.

Whenever a license is assigned to a user, by default a user record would be created in all enabled Power Platform environments within the tenant. This could effectively grant them access to all environments within the tenant.

Security groups can be used to limit access to environments. Then only users who are added to the associated security group will be added to the environment as a user. If a user is ever removed from the security group they are automatically disabled.

Note:
If a security group is associated with an existing environment all users in the environment that are not members of the group will therefore be disabled.

Tip:
Whilst security is massively important when presented with a requirement to restrict access to data it is worth questioning if this is really a security requirement. Or is it just filtering of data for convivence? By doing this you should create a solution which is secure but does not include any unnecessary boundaries.

Data Overview

Additionally you may need to consider any specific requirements around data storage. How long must data to retained? Does it need to reside in a specific country? Are there any laws that apply to how the data can be stored / used?

Sometimes regulatory requirements may also impose specific service level agreements or turnaround times. Or dictate that specific parties / governing bodies must be kept informed or involved in certain transactions.

Data should always be considered as a valuable asset. Therefore designing a security model to ensure the proper usage and access to that valuable asset is paramount. Features like Azure Conditional Access and Data Loss Prevention Policies can be enabled. Additionally ensuring proper usage of secrets / certificates for the services that access the data maybe essential.

Below you can see a diagram which highlights the layers of security which are available. When working with Dynamics 365 maybe an Architect tends to have a focus on the security roles found in the Dataverse. But it should also be noted that beyond these roles additional layers of security exist. For example, to give condition access to Azure or restrict access to connectors.

There are numerous standards for data compliance covering industry certifications, data protection and physical security. During the requirement gathering phases the Solution Architect should question which standards are applicable and may need to confirm compliance. Some examples include ISO27001, GDPR etc. Microsoft publish details of various standards and their compliance here.

Design entities and fields

The Solution Architect should lead the data model design. With model-driven apps …. It is not uncommon for my design work to actually start with what data is to be stored and build out from there. Therefore establishing a high-level data architecture for the project can be an essential early task.

It maybe common for the Solution Architect to design the data model at a high-level before other individuals extend their design. For example, the architect might define the core entities and their relationships but maybe the fields within those entities will be defined later by the design team. If this is the case the Architect would still need to review these detailed designs and provide feedback as the detailed data model evolves.

The Dataverse includes the Common Data Model! This is a set of system tables which support many common business scenarios. The Common Data Model (CDM) is open-sourced in GitHub and contains over 260 entities. Many systems and platforms implement the CDM today. These include Dataverse, Azure Data Lake, Power BI dataflows, Azure Data services, Informatica and more. You can find the CDM schema in GitHub here.

In addition to the industry standard CDM schema, Microsoft provide industry specific accelerators aimed at particular vertical markets. Examples include, Healthcare, Non-profit, Education, Finance and Retails. ISVs may then create industry specific apps which leverage these accelerators. You can find out about the accelerators here.

Whenever possible the standard system tables within the Common Data Model should be used. For example, if you need to record details about customers use the account table for that. This will not only make the system quicker and easier to develop but will aid future maintainability. All Architects should avoid re-creating the wheel!

It will be common to create diagrams to illustrate the data model, often called Entity Relationship Diagrams (ERDs). These show the entities (aka tables) and how they relate to other tables.

In my ERDs I like to highlight which entities are out of the box with no change, which are leveraging out of the box tables but with additional custom fields and which are completely custom.

Typically we will be thinking about tables and columns held within the Dataverse (CDS), conceptually it might be easy to think of Dataverse as a traditional database. But the Dataverse is much more than that! As it includes a configurable security model, can support custom business logic that will execute regardless of the application and even stores data differently depending it type. As relational data, audit logs and files (such as email attachments or photos) are all stored differently.

Sometimes, rather than depicting the tables in an ERD the Solution Architect may first create diagrams to illustrate the flow of data within the solution. Without needing to “worry” about the physical implementation. These diagrams are known as logical data models. Only once the logical data model is understood would the Architect then create a physical data model based on the logical model. The physical data model could take the form of an ERD and could include data within Dataverse, Azure Data Lake, connectors or other data stores.

There are several strategies / techniques that can be used to help the Architect when creating a data model;

  • Always start by depicting the core tables and relationships– having a focus on the core tables will avoid getting side-tracked into smaller (less important) parts of the solution.
  • Avoid over normalization– people with a data architecting background may tend to try and build a Dataverse data model with traditional SQL database concepts in mind. A fully normalised database within the Dataverse may have an adverse impact on the user experience!
  • Start with the end in mind– it is often useful to start off by defining the final reporting needs, you can then confirm the data model adequately meets those requirements.
  • Consider what data is required for AI– if you intend on implementing an AI element into your solution design consider what source data will be needed to support any machine learning / AI algorithms.
  • Plan for the future– consider the data model requirements for today but plan for how this might evolve into the future. (But avoid trying to nail every future requirement!)
  • Use a POC– creating a proof of concept to demonstrate how the data might be represented to users can be a valuable exercise. But be prepared that this might mean trying a data model and then throwing it away and starting again.
  • Don’t build what you don’t need– avoid building put parts of the data model you don’t plan to use. It is simple to add columns and tables later, so add them when you know they are required.

Once the tables within your solution design have been considered you will need to consider the detailed design task of creating columns (aka fields). Columns can be of many different data types, some of which have specific considerations. I will mention just a few here;

  • Two options (yes/no)– when you create these ensure you will never need more choices! If unsure maybe opt for a “Choices” column.
  • File and image– allows the storing of files and images into the Dataverse.
  • Customer– a special lookup type that can be either a contact or account.
  • Lookup / Choices (Optionsets)– which is best for your design! Optionsets (now known as Choices) make a simple user experience but lookups to reference data can give more flexibility to add options later.
  • Date / Time – be careful to select the appropriate behaviour. (local, time zone independent, data only)
  • Number fields– we have many variations to select from. Choose wisely!

Other options exist for storing files / images. Having images and documents in the Dataverse might be useful as security permissions would apply and the user experience to complete upload can be “pleasing”. But size limits do apply so storing large files might not be possible. Other options like SharePoint, which is ideal for collaboration exist. Or you could consider storing the files in Azure storage which might be useful for external access or archiving purposes. As part of your revision …. you may need to be aware of the pros / cons of various methods to store files!

Design reference and configuration data

When we create an table in the Power Platform there are some key decisions to make about how the table is created. Some of these cannot be easily changed later! For example, should the rows be user / team owned or organization owned.

User / team owned records have an owner field on every row in the table. This in turn can be used to decide what level of security is applied for the owner and other users. One good out of the box example of a user owned table might be the “contact” table. Each contact in the system is owned by a single user or team. It might then be that only the owner can edit the contact but maybe everyone can see the contact.

Alternatively tables can be organisation owned. With these you either get access or not! The record within the table are often available to everyone in the organization. These tables are ideal for holding reference / configuration data.

Often one consideration when designing reference data is to consider if a Choice (optionset) or a lookup to an organization owned table is the best approach. I find “choices” most useful for short lists which rarely change. Whilst lookups are ideal for longer lists that might evolve overtime. (As users can be granted permissions to maintain the options available in a lookup. But as the Choice column forms part of your solution the development team would need to alter the items in a Choice column.

MB 600: Microsoft Dynamics 365 + Power Platform Solution Architect – Design data and security model (Part Two)

$
0
0

I am currently preparing to take the Microsoft Dynamics 365 + Power Platform Solution Architect certification. Or “MB 600” for short! As I prepare I plan to write revision notes in this post I will cover topics around designing the data and security models.

Data is a big topic! I therefore plan to split this information into two post. In this second post I will dive deeper into complex scenarios and discuss the more technical aspects of Dataverse (CDS) security.

Note: Microsoft have recently updated some of their terminology. Therefore we should consider the terms like CDS and Dataverse as interchangeable. In terms of the exam I would expect them to begin using the term DataVerse at some point but that change is unlikely to be immediate. Meaning in the short term either term could be used. I created this blog post before the revised terms were announced. I have tried to apply updates but a few “outdated” references may still exist!


Design complex scenarios

Often a Dynamics 365 application will simply access data that resides in the Dataverse. However Power Automate, Power BI and Power Apps (Canvas Apps) can leverage data connectors to access data from many hundreds of sources. Additionally custom connectors can be created as required. These connectors allow us to leverage existing data source and services.

When an “off the shelf” connector does not exist a custom connector can be created. This might work by making use of an existing API. Or you may need to create a custom API and define your own actions. The connectors can be make use of OAuth (including Azure AD), API key and basic auth. Connectors can be packaged and deployed via solutions. Creating as connector that is then available by users for re-use is a great way to empower then to extend the solution using the Power Platform.

Data modelling on the Power Platform should therefore look at the whole data architecture picture and include a logical look at data from the Dataverse, Data Lakes and external sources using connectors.

Azure Data Lake is a hyper-scale repository for big data analytics. Azure Data Lake can store data from all disparate sources, including cloud and on-premise sources of any size and structure. The Data Lake can include CDM and can be integrated with Dataverse. The huge scale of the Data Lake may help support complex scenarios like machine learning, AI and complex reporting when extremely large data volumes maybe required.

  • Dataverse– used for transaction data that apps will consume and maintain. Structure typically based on the common data model.
  • Azure Data Lake– ideal for data from other / multiple systems, read focused and can leverage the common data model.
  • Connectors– great for leaving the data where it is. Supports accessing external sources to make their data available in apps.

There are many drivers which may influence data model decisions, including;

  • Security requirements
  • User experience– it’s easy to forget that as we add normalization and relationships we create new constructs users need to navigate to be successful
  • Data location– some data must be stored in a given GEO
  • Retention policies– not all data can be stored indefinitely!
  • Self-service reporting– if the data model becomes complex can a “regular” user still extract the data for their reporting purposes? Or will all reports end up needing a data architect to design them??
  • Roadmap – what are the plans for the future?
  • Existing systems– are we going to connect with any existing systems or does any existing data need to be “squeezed” into the new data model.
  • Localization– Multi-region, multi-lingual, multi-currency requirements

Custom Activities

Out of the box we have activities like phone call, email and task. But custom activities can be created as required. The advantage of creating a custom activity is that they show in the timeline lists with other activities. But you need to be aware that security is applied consistently across all activities. So if a user is given the ability to delete tasks, this would actually mean they can delete any activity type. (Including your custom activity.) Activities can be regarding any table that is enabled for activities, meaning a custom activity could be regarding “anything”. (Although you could consider some control by limiting which entities are available to users in your model-driven app!)

Calculated and Rollup Fields

The Dataverse provides us with options to create calculated or rollup fields.

Calculated fields are populated on the retrieve of records. They are read-only. They can be based on fields within the table or its parent.

Rollup fields are stored on the table. Like calculated fields they are read-only, they are calculated (re-calculated) based on a update schedule or on demand. The values on the parent are rolled up from child records. (1:N only!) Filtering on the related table can be applied.

In complex scenarios …. it is possible to include rollup fields in calculated fields. And it is possible to rollup “simple” calculated fields.

Relationships

Often we will work with one to many (1:N) relationships. So one order can have many order lines etc.

There are situations when you may need a many to many relationship (N:N). For example one patient could be seen by many doctors. And at the same time each doctor would have many patients.

Deciding when an N:N relationship is needed can sometimes be harder than you’d think! Creating a POC of your data model can help identify many to many relationship requirements.

Tip: If you aren’t fully familiar with the types of relationships in the Dataverse and the possible cascade logic then some additional revision into relationships may be beneficial.

You may wish to review this post in which I explain table relationships.

Alternate Keys

You can also define alternate keys. Alternate keys can contain decimal, whole number, text fields, dates and lookup fields. Entities can have up to 5 alternate keys. An index is created behind the scenes which is used to enforce uniqueness. An alternate key can be made up of multiple fields but its total length cannot exceed 900 bytes or 16 columns per key.

Alternate keys are often useful for fields like account number (etc) that may be primary references supplied to / from external systems. And would therefore need to have uniqueness strictly enforced.

Design business unit team structure

Business Units are a fundamental building block in the Dynamics security model. They define the structure of the organization.
Business units provide a great way to manage record access for large numbers of users with permissions being granted to the current business unit and / or its children.

Therefore the first security construct to consider are business units, these allow you to define the structure of your organization. Users, teams and security roles will be linked to business units making them a fundamental building block in the security model. Business units can have a hierarchy. This might reflect the organizations actual hierarchy but that isn’t always the case. In actual fact the hierarchy is designed to “drive” which users get access to what records.

Each business units has a default team that includes all users assigned to that business unit. Each user can only be in one business unit but they can be added to additional teams as required.

Teams have several uses in Dynamics 365 / Power Platform. Teams are essentially lists or groups of users and can be used to help manage security. Teams may also be useful when creating reports. Additionally, teams can be useful when you wish to share “assets” with a group of users. (Assets could include views, charts, dashboards or records.)

Owner teams within the Dataverse can simply include lists of users. But a Dataverse team can also be connected to an Azure Activity Director Office Group or Security Group.

We also have a concept of Access Teams. Access teams are dynamically created on a per record basis. The access granted to the members of the team to the specific record is based on an access team template.

If you need to revised the concepts of business units and teams in greater depth, try reading my post on the subject here.

Tip:
when designing the data model consider its manageability. Creating large numbers of busi
ness units and security roles may give granular control of security options but could also result in a solution which is a nightmare to manage. You should use business units to restrict access as required but do not be tempted to simply match the organisations structure.

Security Hierarchy

An additional approach to security is to use a security hierarchy. With this approach a manager is granted access to the records of their team members. As a multi-level team structure could exist the permissions can be inherited through multiple levels. This way a manager can read records for their direct reports and further into the hierarchy. The manager however can only maintain records owned by their direct reports.

The security hierarchy can be based on a concept of manager or position. With manager the manager field from the systemuser record is used. With a position approach custom positions are defined and users assigned to each position. (The position approach allows crossing of business unit boundaries.)

When defining the hierarchy settings we can decide how many levels to target. The number of levels implemented should typically be kept as low as possible, maybe 4 levels. Although the theoretical maximum number of levels is 100.

Note: You cannot combine manage and position hierarchies at the same time.

Design security roles

Security roles within the Dataverse provide users with access to data. As a general principle users should only be granted access to data that they really need to access.

The Solution Architect will need to decide what approach should be taken to security roles. Dynamics 365 does ship with a number of out of the box security roles, commonly these will be copied and then amended as required. There are some common strategies for building security roles;

  • Position specific– each person who holds a given position is given one specific role. (All users have one role.)
  • Baseline + position– a baseline role is created which grants access to the entities needed by all users. Then an additional role is added specific to the additional requirements for a given position. (All users have at least two roles.)
  • Baseline + capability– again a baseline role is created. Then roles for each capability / feature that might be required. (All users would have multiple roles.)

Tip:
As part of your revision you may wish to consider the advantages and disadvantages of each of the strategies above. Additionally maybe review how security is achieved in your current organization!

Each role is linked to a business unit. The roles then contain many options that govern the access to entities and features for the combination of business unit and user (or team).

Often roles will be inherited from a parent business unit. Meaning when I use the manage roles on a user linked to a child business unit, I still see the roles from the parent business unit. This happens even though I haven’t created any roles specific for the child unit!

Each user (or team) can have multiple roles. The Dynamics 365 security model works on a least restrictive security model. Meaning a “sum” of all the roles assigned to the user would be applied. Additionally when a role is assigned to a team, we can select if the privileges apply to “just” the team or if they get applied directly to the user. Meaning members of the team inherent the privileges as if the role is applied directly to their user record.

Each role is made up of several options (actions) for each table / feature in Dynamics 365. Entities typically have multiple actions covering functions including, create, read, write, delete, append, append to, assign and share.

Each table can be organization owned or user / team owned. Organization owned entities have to security privileges, meaning each user either is isn’t granted access. Whilst user / team owned entities support access be granted to the user, business unit, child business units or organization.

If you need to revised the concepts associated with security roles in greater depth, try reading my post on the subject here.

Design column (aka field) security

Often it will be sufficient to only control access to an table. But it maybe that a particular column on a table contains sensitive data that only certain users can see and maintain. We can hide columns on forms but this does not actually secure the data.

In these scenarios Dynamics 365 and the Power Platform supports column level security.

For example you may store information on contact about their disabilities / special needs. A limited number of users may need access to this information but maybe most users don’t need to see what disabilities a person might have.

You can read about how this operates here.

MB 600: Microsoft Dynamics 365 + Power Platform Solution Architect – Design integrations

$
0
0

I am currently preparing to take the Microsoft Dynamics 365 + Power Platform Solution Architect certification. Or “MB 600” for short! As I prepare I plan to write revision notes in this post I will cover my revision connected with designing integrations.

Note: Microsoft have recently updated some of their terminology. Therefore we should consider the terms like CDS and Dataverse as interchangeable. In terms of the exam I would expect them to begin using the term Dataverse at some point but that change is unlikely to be immediate. Meaning in the short term either term could be used. I created this blog post before the revised terms were announced. I have tried to apply updates but a few “outdated” references may still exist!

The Solution Architect will be required to identify when integrations maybe required. They will lead the design of any integrations and document how they will be included into the overall architecture. It will be the Architect’s role to ensure any integrations do not make the solution “fragile” and may additionally need to consider integrations as part of an overall disaster recovery plan.

There are many reasons we need integrations. Integrations maybe required to provide a consistent interface for users / customers. Maybe real-time integrations are needed to keep disparate systems up-to-date. Often integrations may be required to avoid reinventing the wheel! Reusing an existing system or component with the help of integrations maybe be more cost effective and achievable than reimplementing.

A Power Platform Solution Architect must have a deep technical knowledge of Power Platform and Dynamics 365 apps plus at least a basic knowledge of related Microsoft cloud solutions and other third-party technologies. When designing integrations the Solution Architect will review the requirements and identify which parts can leverage a Dynamics 365 apps and which parts must be custom built by using the Power Platform, Microsoft Azure etc.

Historically an architect might have started with custom development in mind but a Power Platform Solution Architect will typically start their design process with a focus on Dynamics 365 and the Power Platform and only later use Microsoft Azure and other custom approaches to address any gaps.

When considering the design of integrations it maybe worth thinking about how the Dataverse operates. The Dataverse is a software-as-a-service (SaaS) platform, therefore most of its architecture, such as underlying data storage, are abstracted from developers so they can focus on other tasks such as building custom business logic and integrating with other applications.

Note:
Historically we may have used SOAP API to programmatically retrieve data from the Dataverse (CDS). But these days the web API is the preferred approach. If you aren’t already familiar with the web API approach you can read about about it here.

Most solutions do not exist in isolation, they rely on internal and external integrations. A part of identifying solution components the Architect should highlight how any integrations will be handled. We may need to define what tools or services will be used to complete the integrations. And also potentially define clear boundaries on where one system ends and another begins. The Solution Architect should focus on what happens on these boundaries. Often multiple parties will be involved in the development of integrations so clearly defining which boundaries are “owned” by which supplier or internal development teams maybe critical.

Integrations can take many forms.

Data integration– “just” combining data from different sources. Maybe to provide the user with a unified view. Data integrations maybe event base (near real-time) or batch based (maybe with overnight updates).

Application integration– a higher level integration connecting at the application layer.

Process integration– potentially you retain multiple disparate systems but each of those systems remain part of the overall business function.

Design collaboration integration

Often integration may involve collaboration tools such as Outlook, Teams, Yammer and more.

SharePoint for example maybe leveraged for document storage, whist Teams can be created to help groups of users collaborate.

Often the associated collaboration tools will sit outside of the Power Platform and Dynamics 365.Meaning each tool would have its own requirements / constraints in terms to license costs, security considerations and more.

Design Dynamics 365 integration

There are a number of different types of integration / extensibility options available to us when considering the integration of Dynamics 365 applications.

Some of these capabilities are baked into the Power Platform, including business rules, calculated fields, workflow processes and much more. Client-side extensibility can also be created with JavaScript.

Additionally developers can access the transactional pipeline with plugins. (using .net SDK) Or custom workflow activities. As mentioned we can access the Dataverse (CDS) API service using SOAP or web API (OData).

Custom business logic can be created via plugins. This custom logic can be executed synchronously or asynchronously. The results of synchronous calls can be seen by the users immediately but this does mean the user is “blocked” until the call completes. Whilst with asynchronous calls will not block the user. However asynchronous calls can only run post operation. (Synchronous calls can run post or pre-operation.)

Synchronous calls are included in the original transaction but are limited to 2 minutes. Whilst asynchronous customizations would not be part of the original transaction.

FYI: When you use the Dataverse connector in Power Automate or a Canvas App it will be making calls to the OData API. (Power Automate runs asynchronously.) Classic workflows can run synchronously (real-time) or asynchronously.

Any custom logic may run on the client or the server. Examples of client side extensibility would include canvas app formulas, JavaScript on model-driven forms, business rules (with form scope) and the Power Apps component framework. Client side customizations happen in the user interface, meaning the user will see the results immediately. But as in the user interface any customizations will normally only be enforced in the specific client applications.

Whilst server side customizations only happen when the data is sent to the server. Meaning users would only see the results when a data refresh is completed. Server side customizations can be created with plug-ins, Power Automate flows, classic workflows and business rules (with entity scope).

To ensure consistent availability and performance for everyone the platform applies limits to how APIs are used by the Common Data Service. Service protection API limits help ensure that users running applications cannot interfere with each other based on resource constraints. These limits should not affect normal users of the platform. You can read an overview of API limits here.

API requests within the Power Platform consist of various actions which a user makes. Including;

  • Connectors– API requests from connectors in Power Apps and Power Automate
  • Power Automate – all power automate step actions result in API requests
  • Dataverse (Common Data Service)– all create, read, update and delete (CRUD) operations. Plus “special” operations like share and assign.

You can read more about APIs and their limits here. Because limits exist the Solution Architect may need to optimize integrations to minimize API calls. Additionally data integration applications may need to handle API limit errors, this is done by implementing a strategy to retry operations if an API limit error is received. You can read about the service protection and API limits here.

Design internal system integration

Internal app builders / customizers maybe able to leverage low code approaches to support internal integrations. Maybe these integrations can be created using canvas apps or power automate flows with standard or custom connectors. Additionally canvas apps maybe embedded into model-driven apps to leverage connectors.

Power Automate maybe used for event based data integrations especially if integrations are needed between multiple Dataverse environments.

Design third-party integration

Developers maybe required to assist with 3rd party integrations. Maybe this will involve creating custom APIs, developing plug-ins or using other technologies such as Azure Logic Apps or Azure Service Bus.

Virtual entities may also give visibility of external data sources directly in model driven apps. Or maybe custom UI controls can be created to surface 3rd party data using the PowerApps Component Framework (PCF).

With inbound data integrations 3rd party tools such as KingswaySoft or Scribe maybe used. When using such tools performance / throughput may need to be considered, you possibly need to design multiple threads to overcome latency effects.

Web application integrations maybe created using webhooks. Where custom call backs maybe triggered using JSON in a http post request. Webhooks maybe synchronous or asynchronous.

Design authentication strategy

The systems into which integrations are required may demand differing approaches to authentication.

When working in a batch mode for updating data the timing of authentication requests may also be a consideration which could impact performance. Maybe you shouldn’t authenticate on every request!
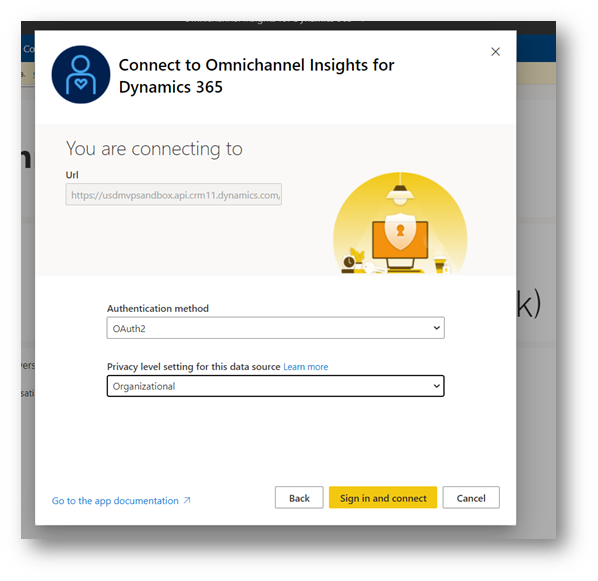
OAuth

OAuth is a standard that apps can use to provide client applications with “secure delegated access”. OAuth works over HTTPS and authorizes devices, APIs, servers, and applications with access tokens rather than credentials. Authentication integration maybe provided with OAuth providers such as Azure Active Directory, Facebook, Google, Twitter and Microsoft accounts. With basic authentication the user would always have to provide a username and password. With OAuth the user sends an API key ID and secret.

Design business continuity strategy

In terms of availability and disaster recovery the Power Platform components should handle concerns with internal integrations. Therefore the Solution Architect may need to focus on external integrations. Additionally manual environment backup / restore operations can be used to help with “self-created” problems like bad deployments or mass data corruptions.

Separation of applications can reduce their reliance on each other. Using Azure Service Bus may allow integrations between systems in a decoupled manner.

Design integrations with Microsoft Azure

Webhooks can only scale when the host application can handle the volume. Azure Service Bus and Azure Event Hubs maybe used for high scale processing / queuing of requests. Although the Azure approach can only be asynchronous. (Webhooks can be synchronous or asynchronous.)

Azure Service Bus

CDS supports integration with Azure Service Bus. Developers can register plug-ins with Common Data Service that can pass runtime message data, known as the execution context, to one or more Azure solutions in the cloud. AzureAzure Service Bus integrations provide a secure and reliable communication channel between the common data service runtime data and external cloud-based line-of-business applications. You can read more about Azure integration here.

Azure Service Bus distributes messages to multiple independent backend systems, decoupling the applications.

Azure Service Bus can protect the application from temporary peaks.

Azure Event Hubs

Azure Event Hubs is a big data streaming platform and event ingestion service. It can receive and process millions of events per second. Data sent to an event hub can be transformed and stored by using any real-time analytics provider or batching/storage adapters.

The following scenarios are some of the scenarios where you can use Event Hubs:

  • Anomaly detection (fraud/outliers)
  • Application logging
  • Analytics pipelines, such as clickstreams
  • Live dashboarding
  • Archiving data
  • Transaction processing
  • User telemetry processing
  • Device telemetry streaming

Event Hubs provides a distributed stream processing platform with low latency and seamless integration, with data and analytics services inside and outside Azure to build your complete big data pipeline.

Event Hubs represents the “front door” for an event pipeline, often called an event ingestor in solution architectures. An event ingestor is a component or service that sits between event publishers and event consumers to decouple the production of an event stream from the consumption of those events. Event Hubs provides a unified streaming platform with time retention buffer, decoupling event producers from event consumers.

Azure Logic Apps

Azure Logic Apps is a cloud service that helps you schedule, automate, and orchestrate tasks, business processes, and workflows when you need to integrate apps, data, systems, and services across enterprises or organizations. Logic Apps simplifies how you design and build scalable solutions for app integration, data integration, system integration, enterprise application integration (EAI), and business-to-business (B2B) communication, whether in the cloud, on premises, or both.

Every logic app workflow starts with a trigger, which fires when a specific event happens, or when new available data meets specific criteria. Many triggers provided by the connectors in Logic Apps include basic scheduling capabilities so that you can set up how regularly your workloads run.

In many ways Azure Logic Apps and Power Automate Flows have a lot in common. However; Power Automate Flows can be packaged as part of a CDS solution. And Power Automate CDS connector has more capabilities. Plus Power Automate allows UI Automation.

Azure Functions

Azure Functions allows you to run small pieces of code (called “functions”) without worrying about application infrastructure. With Azure Functions, the cloud infrastructure provides all the up-to-date servers you need to keep your application running at scale.

A function is “triggered” by a specific type of event. Supported triggers include responding to changes in data, responding to messages, running on a schedule, or as the result of an HTTP request.

While you can always code directly against a myriad of services, integrating with other services is streamlined by using bindings. Bindings give you declarative access to a wide variety of Azure and third-party services.

Azure functions are serverless applications.

Choosing between Power Automate, Azure Logic Apps, Azure Functions and Azure App Service Webjobs maybe confusing! As all of these solve integration problems and automate business processes. This link may help you compare these options!

MB 600: Microsoft Dynamics 365 + Power Platform Solution Architect – Validate the solution design

$
0
0

I am currently preparing to take the Microsoft Dynamics 365 + Power Platform Solution Architect certification. Or “MB 600” for short! As I prepare I plan to write revision notes in this post I will cover everything that might fall under the heading “validate the solution design”.

Note: Microsoft have recently updated some of their terminology. Therefore we should consider the terms like CDS and Dataverse as interchangeable. For the exam I would expect them to begin using the term DataVerse at some point but that change is unlikely to be immediate. Meaning in the short term either term could be used. I created this blog post before the revised terms were announced. I have tried to apply updates but a few “outdated” references may still exist!

The Solution Architect will work with the Quality Assurance (QA) team to ensure testing includes all parts of the architecture. This could include functional testing but may also include other types of testing such as disaster recovery and performance testing.

Proper testing is essential to ensure project success. The Architect is often one of the key people who knows the solution the best and therefore can guide the test team on how to validate it. Testing shouldn’t be considered something that just happens towards the end of a project, testing must be an ongoing effort from the first component built until go live. It is now a one-time big exercise it is an iterative, repetitive task that happens thru out the project life cycle.

Evaluate detail designs and implementation

By the implementation (build) phase the Solution Architect has set the path the implementation team will follow. By this point the Architect will have created a high level solution design document (SDD) and will have reviewed any associated detailed designs. Meaning that during implementation the role of the Architect will shift to be a supporting one for the Project Manager and Delivery Architect. As they will be responsible in ensuring the developers create the solution as defined. This includes facilitating reviews with the team to ensure implementation is meeting the architecture as well as reviews with the customer to ensure the solution is meeting their stated requirements.

During the build problems will happen! Therefore the Solution Architect is also involved in problem solving as they are often one of the few people who understand all the “moving parts” involved in the solution. Some of those “problems” maybe found by the testing team and the multiple types of testing they may complete.

There are many types of testing, I will highlight some of the common types below;

Test TypeDetails
Units TestsTypically the unit tests will be created and run by the application builder or developer. Unit tests confirm the correct operation of each component in isolation.

It will be a common practice for everyone to check their own work before handing off. Manual testing maybe completed for all apps, business rules and plug-ins. (etc.) Some tests can be automated using Power Apps Test Studio and Visual Studio.

Functional TestsFunctional testing verifies that the implementation meets the requirements.
Acceptance TestsAcceptance testing is completed by the end users. Although I have often seen test teams support the business in this task. The purpose / outcome of an acceptance test is the formal approval that the solution is fit for purpose.
Regression TestsTests completed on non-changed functions. Regression tests typically aim to prove that nothing has been “broken by accident”.
Integration TestsVerification that everything works together. Including various internal systems and any integrated 3rd party services.

The Solution Architect maybe called upon to help the test team understand how to test integrated components.

External systems will need to be available for testing. Sometimes they may require careful preparation to ensure real data is not impacted. For example, email integration testing must ensure messages aren’t inadvertently sent to real customers!

Performance TestsConfirmation that the system can cope with expected peak loads. (And maybe “slightly” beyond the stated peak loads. Can the system cope with future growth??)

You may need to define performance “hotspots” to test. These maybe areas of the system known to be complex or those where the business has expressed specific performance expectations. Additionally requirements gathering might need to establish what peak volumes look like. Occasionally you may even have contractual obligations to test, it maybe that the contract specifies the system must support “n” users or cope with “y” transactions etc etc.

You may need to include the infrastructure as part of performance testing. For example, network traffic at remote offices may need to be measured including network latency and bandwidth.

Migration TestsPractice data migrations to ensure data quality.
Disaster Recovery TestsHaving a disaster recovery plan is great but it is useless unless you can test it works.
Go Live TestsIt is common to complete multiple “dry runs” of the go live process. This might involve data migrations tests!

Note:
Performance testing may make use of Azure App Insights

Azure Application Insights, a feature of Azure Monitor, is an extensible Application Performance Management (APM) service for developers and DevOps professionals. Use it to monitor your live applications. It will automatically detect performance anomalies, and includes powerful analytics tools to help you diagnose issues and to understand what users actually do with your app. It’s designed to help you continuously improve performance and usability. You can find out more about Azure App Insights here.

Validate security

Having collected your security requirements, designed a solution and built it …. You will need to test that security is being achieved in the required manner.

In terms of the Power Platform application this can require a significant testing effort. As test scripts will be required that must be repeatedly run against each user persona. (or set of security roles if you like.) This effort should not be under estimated.

We should also consider security beyond the Power Platform. For example, we might be using SharePoint for document management integrated in with our solution. Meaning access to SharePoint may need to be tested independently of our Power Platform solution.

MB 600: Microsoft Dynamics 365 + Power Platform Solution Architect – Support Go-Live

$
0
0

I am currently preparing to take the Microsoft Dynamics 365 + Power Platform Solution Architect certification. Or “MB 600” for short! As I prepare I plan to write revision notes in this post I will cover Support Go-Live.

Note: Microsoft have recently updated some of their terminology. Therefore we should consider the terms like CDS and Dataverse as interchangeable. For the exam I would expect them to begin using the term DataVerse at some point but that change is unlikely to be immediate. Meaning in the short term either term could be used. I created this blog post before the revised terms were announced. I have tried to apply updates but a few “outdated” references may still exist!


In an ideal world there wouldn’t be a support need for a perfectly architected solution! The reality is support is always needed after an implementation. The Solution Architect should be an active participant in the planning of post go-live support and the transition from “project mode” into business as usual.

Post go-live we would typically expect the role of the Solution Architect to be diminished. As on a day-to-day basis the Architect is unlikely to have an involvement. Although often I’ve seen a heighted period of support immediately after the initial production release, I think we can reasonable expect the Solution Architect to remain closely involved during this early period. Often this will involve helping progress any bugs or minor enhancements required post go-live. The Architect may also need to review various reports on system usage, network telemetry, storage capacity and much more. This will help them understand that the solution is being used as expected and is also performing in an optimal way.

This continued involvement of the Solution Architect post go-live helps ensure the team stays engaged as they need to stay involved until the “very end” to ensure success.

Microsoft Release Process

In addition to considering the customer’s release / deployment approach the Solution Architect will need to be aware of Microsoft’s release cadence /approach.

There are different types of releases that Microsoft might make to the Power Platform and Dynamics 365.

  • Quick Fix Engineering (QFE) / Patches– in response to major issues or security risks Microsoft can make deployments worldwide within hours.
  • Weekly patches– bug fixes, performance enhancements, stability improvements (etc) are pushed out on a weekly basis. These weekly updates could include new admin features or user facing customizations which you must opt into. But they wouldn’t typically include changes which are user facing by default.
  • Twice annual release waves– Starting in April and October major changes which are user facing will be include in release waves. The release notes for these updates are published four months in advance of the wave starting. And you can “test drive” the changes two months prior to the release.

In line with the annual releases Microsoft publish roadmap details in release plan documents. The Solution Architect should be aware of what is on the roadmap that could impact the solution architecture. It maybe new features should be evaluated and decisions taken on when best to adopt the new capabilities. Often Microsoft release new features in a preview state, when this happens it maybe useful to evaluate the feature but until the full release version is available it is not recommended preview features are used for production purposes. (As they are likely to be changed or removed!)

Additionally, importantly along with each release wave Microsoft may announce feature deprecations. Typically when this happens the feature in question is still available but will no longer receive any updates and will potentially be completely removed from the Power Platform / Dynamics 365 in the fullness of time. The Solution Architect should therefore confirm no deprecated features are being used and when in use plan for their replacement.

Finally the Solution Architect should be mindful not to include any unsupported customizations. As doing this will ensure the fast paced updates from Microsoft do not adversely impact the solution.

Another topic the Solution Architect should monitor is how the customer’s licenses maybe impacted by feature deprecations or the bi-annual release waves. As it is not uncommon for new features to need new licenses!

Facilitate risk reduction of performance items

Often the activities involved in testing and go live preparation will come towards the end of the project life cycle but I suggest it might be important to understand that testing and readiness does not have to wait until the end of a project. Continuous testing can be used to keep all stake holders informed on solution quality and readiness, this can in turn improve your chance of success and lead to a smoother handover from “project mode” into business as usual.

Additionally post go-live it will be important to monitor the performance of applications.

For example reviewing the performance of your canvas apps should be an ongoing effort, you may (for example) be able to off load “work” completed in the canvas app into a Power Automate. And therefore create a more responsive UI. You may be able to use test studio to create repeatable tests for your canvas apps. This will allow regression testing and become an important part of your software development life cycle (SDLC). Test studio is a pretty new tool to help validate that canvas apps work as expected, you can read about it here.

The Solution Architect will help the customer understand the readiness of the system and any associated risks of known issues. In doing this they will help guide the customer towards an informed go live decision. Often the Solution Architect will know the system better than anyone so an informed risk assessment of the systems readiness is something the Architect is well placed to perform. They should know better than anyone what could break, what might not work as designed and what actions can be taken if the system goes down.

Troubleshoot data migration

During the testing phase, data migration should have been tested and the resulting data checked for completeness and accuracy. Repeating these tests multiple times should help ensure the final go-live migration operates as smoothly as possible.

With large implementations it may not be physically possible to migrate all of the historic data on day one. Therefore data migration plans maybe needed to prioritize which data gets imported first.

Review and advise in deployment planning

The Solution Architect will typically be part of the delivery team that will have been put in place to build and test the solution. It will be the Architects role to help build this team and validate any development and testing plans. During the implementation phase the solution architect will become key in triaging any development problems.

Creating a deployment plan is essential in ensuring all go live steps are completed and sequenced correctly. The Solution Architect may not be the person who actually creates the deployment plan but the Architect should expect to provide input into the plan and act as a reviewer.

The architect should whenever possible support the deployment process by identifying risks and help form a “plan B”. The Solution Architect is the “champion of the solution” and may often be the first port of call when the customer is unhappy with progress during deployment.

Some common go live problems (to be avoided) may include;

  • No roll back plan– if the deployment goes bad what are we going to do? Can we roll back? (And has that roll back been tested?)
  • Not enough testing– testing maybe very comprehensive but have you done enough real-world testing? Do the customizations really meet the users needs and does the system perform as expected with real user / data volumes?
  • Outstanding defects not evaluated– perfection is rare but have any outstanding issues been properly evaluated. Is the impact of fixing now compared to post go live fully understood?
  • Incorrect environment assumptions– avoid incorrect assumptions about end user workstations or network configurations.

The Architect should review deployment plans and seek out ways to streamline and simplify the plan. For example, can some of the data be migrated early or can we pre-deploy our mobile apps etc.

Additionally have all user logins been created, appropriate licenses assigned and do they all have the correct roles in the Dataverse (CDS). If possible get all users to access a dummy productions environment to help spot any issues early.

It may be the case that you have to deploy the new application as a “big bang”. But if possible consider if the old system can be run in parallel to the new. Meaning can we slowly move users over to the new system in a controlled manner. Or if a “big bang” is the only option then the Solution Architect may need to advise on the level of risk involved in this process.

Automate the go live

Consider how much of the go live deployment process can be automated. As an automated process is less likely to fail and is also more testable prior to the actual go live.

You may, for example be able to automate the creation is users, teams, business units. Or you may be able to automate the import / creation of reference data. (Microsoft’s configuration migration tool may assist with this.)

But if you do use any automations during the go live process take care to ensure they are well tested.

With or without automations it is essential to have a go-live check list and a timeline. Plus test this check list! Does it include everything and are the timings achievable / realistic. And have we allowed sufficient contingency for any issues that could crop up.

Review and advise with Go-Live Assessment

It may be true that the Solution Architect will be involved in any go / no-go decisions.

Often we may envisage that a solution will be perfect by the time of go-live. In reality this is rarely the case! It will be likely that the Solution Architect may need to help communicate details of any known issues that will be present at go-live. The Architect maybe called upon to evaluate the impact of fixing any outstanding issues now or once live. (In my experience fixing some issues post go live can be much more costly.)

Documentation at go-live maybe critical to ensure decisions, agreements, tasks and assumptions aren’t forgotten. A quick agreement reached in the hallway can quickly be forgotten! Any consents reached with the customer should be documented.

Plus any suggestions / recommendations made should be recorded, especially if the customer rejects a recommendation. You want to avoid someone incorrectly saying afterwards “why didn’t you tell us that??”.

Once the system is live the Solution Architect is often the first person who gets called when problems arise. They can help triage problems and isolate the root cause. In resolving go-live issues the Architect must consider the immediate impacts as well as the longer term. Can we mitigate the issue now with a “quick fix” whilst also considering a longer term solution to avoid future reoccurrences?

Omnichannel for Customer Service – Outbound Messages (SMS)

$
0
0

We now have the capability in Microsoft’s Omnichannel for Customer service to commence outbound conversations with our customers using SMS, WhatsApp and Twitter. In this post I will give an example of how we’d configure an outbound SMS. (In later posts I plan to cover WhatsApp and Twitter.)

You can read all about the outbound capabilities in Microsoft’s documentation here.

The overall concept is that we create an outbound message template, enable outbound messaging on a given channel and then create a Power Automate Flow that will send the message. Plus the message template can include dynamics values which can be provided by the Flow, an approach that allows us to personalize the outbound message.

When describing a feature I tend to like to show an actual example of how I’ve configured it. The Microsoft documentation describes a common scenario of sending a message when a case is created or resolved. They even include example Power Automates that you can download and amend. These will be common uses of outbound messages and I do suggest you review their examples.

In the interest of showing something different I have decided to use a different example … this will be based on a proof of concept I created for a real scenario!

My use case was a little different! I wanted to generate an SMS to someone when a conversation request arrived into Omnichannel. Why??? …. Well in my scenario we wanted to alert someone with that a fresh conversation had started. Maybe you have someone on out of hours support who needs to monitor incoming conversations on a particular channel. If the volumes are low we can’t expect them to be glued to the screen 24/7, so having a “nudge” from an SMS might be useful.

This does mean that my example is a little more specific than those mentioned in the Microsoft documentation. But actually the steps involved are pretty much the same. Those being;

  1. Create a message template
  2. Configure outbound messaging
  3. Create a Power Automate to send the message

Tip: If a customer receives an outbound message. If / when they reply to that message they’d effectively commence an inbound conversation with one of your agents. Imagine, for example, that you send them an outbound message saying “Your delivery will be at 10am tomorrow”. They could reply explaining they wouldn’t be at home tomorrow etc. So my tip is, when considering outbound messages you might want to consider the full customer journey. As the outbound message may just be the start of the conversation with your customer.

Step One – Create a message template

Below you can see that I have opened my Omnichannel Administration app and within this located the messaging templates option. Within here you will see any existing templates, which you can amend. Or you can use the “+ New” option to create new templates.


Below you can see my example message template. It is a pretty simple message!

All I have done is given my template a name and picked the channel. SMS, in this example.

Next I enter the text for my message. Notice that I have entered “{Myname}”. Anything between the brackets will be substituted for dynamic information by my Power Automate. We’ll see how that works later in this post!

Tip:
My example is pretty simple in that I am only going to send the message in English. Notice that I could create multiple versions of the message with localised text if I wanted to implement to multiple languages.

Step Two – Configure Outbound Messaging

Now I have my outbound template I am ready to configure my outbound channel to use that template. Below you can see that in the Omnichannel Administration app I have located the “Outbound” option. Within this we can see my existing outbound configurations. You can edit those from here or use the “+ New” option to create a new one.

I actually have two providers of SMS defined! Telesign and Twilio. So in my example I have created both as I wanted to test working with either of my two SMS numbers. But each of these will leverage the same outbound template. Hopefully you can see that this gives you flexibility if you happen to have multiple SMS numbers defined. (Or WhatsApp and Twitter accounts if you wish to send outbound messages using those channels.

Below I have shown one of my outbound configurations.

Notice the configuration ID. This is generated when I save the configuration. You will need to copy this as we’ll use it within the next step of creating a Power Automate Flow to send the outbound messages.

Also notice that I have selected the SMS channel and also picked which channel I want to use. Plus I have linked this configuration to the message template I created in the first step.

Importantly notice the “show in timeline” option. In my scenario I just wanted to send out the message and didn’t need it to show in the timeline of any related record. So I entered “No”.

In other scenarios you will want to link the outbound message to an associated case or other entity. If you need this enter “Yes”. But having done that you will also need to provide details of the regarding “object” in the Power Automate that we will create in the next step.

Step Three – Create a Power Automate to send the message

Now my Outbound message has been defined I needed to create a Power Automate to send the message. You could trigger the message in many ways … for example when a case is created. But in my example I will trigger the Power Auotmate when a conversation in Omnichannel is created.

I have shown the steps in my Power Automate below. I will then expand on each of these below. At a high level the actions in my Power Automate are as follows;

  1. Conversation (Created)…. As explained my Power Automate is triggered when a conversation is created.
  2. Initialize (ContactList)…. Firstly I initialize an array. At this point it will be blank but later we will add the contact you will receive this message.
  3. Get (NeilParkhurst Contact)… I added this step to query the contact I wanted to send the message. (If you has a case maybe you’d read details for the customer associated to the case!)
  4. Append to array variable… Having queried my contact I add details for the message to my array.
  5. Compose (JSON)… next I format my array as JSON, as required by my next step.
  6. Unbound action (Send SMS)… My final step is to trigger an action to send the SMS.

In the following sections I will detail exactly how I defined each of my Power Automate actions.

Conversation (Created)

My first tile is pretty simple. Here I am simply saying that the Flow is triggered on create of a “Conversation”. In my final production version I may have wanted to use the advanced options to filter which conversation. Or maybe I would have followed this step with a condition to check if I wanted to send the SMS. But this was a simple proof of concept, so I simply trigger my Flow for every conversation that is created.

Initialize (ContactList)

Here I am simply initializing an array variable which will be called “ContactList”. I will use this later in my Flow.

Get(NeilParkhurst Contact)

In this next step I am running a query to get the contact that I want to send the message. (As I need to find their mobile number!)

Again keep in mind that this is a simple proof of concept example. As I have queries the contract directly from the ID of my contact. You will probably want to do something more creative to find the contact or contacts that need to receive this message.

Append to array variable

Here I am adding details of my contact into the array. Specifically I am defining the mobile phone number to use for my message.

Also notice that under context items I have set a variable called “Myname” to the first name of my contact. If you recall in step one I included “Myname” in my message template. Meaning at runtime the contacts name will be inserted into my templte.

I have shown the value for my append action below;

{
"tocontactid": "@{outputs('Get(NeilParkhurst_Contact)')?['body/mobilephone']}",
"channelid": "sms",
"optin": true,
"contextitems": {
"Myname": @{outputs('Get(NeilParkhurst_Contact)')?['body/firstname']}
  }
}

Note:
If earlier you’d selected the option to add the message into the timeline. In this contextitems section you’d need to include the “regardingobjectid” and “entityrealtionshipname” for the regarding table. If you are doing that you might want to review the example in the Microsoft documentation I referenced at the start of this post.

Compose (JSON)

The next action simply composes my array ready for use.

Unbound action (Send SMS)

My final action sends the message. You create an unbound action and enter the name “msdyn_InvokeOutboundAPI”.

Next we add the ID of your outbound configuration. (This is the ID from the outbound configuration which I commented you needed to copy in the previous step!)

You need to add the ID into a field called “msdyn_ocoutboundconfiguration msdyn_ocoutboundconfigurationid”.

Tip: I made an mistake at this point!!! As you can see from the screen shot below the names wrap and I couldn’t easily read the entire name. Therefore you need to be really careful that you assign the ID to the correct field as there are several with very similar names!

My final setting is to add the output from my “Compose (JSON)” action into the ContactList for this unbound action.

Once my Power Automate was turned on I began to receive text messages every time a new conversation arrived into Omnichannel. Honestly, this might not be the best example in the world! But I hope you can see that the overall concept is pretty straight forward and you could amend my idea for many situations.

Meaning the resulting solution is actually very flexible and pretty simple to implement. Enjoy.


Omnichannel for Customer Service – WhatsApp

$
0
0

Microsoft’s Omnichannel for Customer Service supports the WhatsApp channel, in this post I will explain how I configured this to work in my environment.

WhatsApp is obviously a widely adopted social channel with many customers favouring engaging with businesses using WhatsApp. The WhatsApp feature of Omnichannel for Customer service supports WhatsApp integration via Twilio.

You might need to appreciate WhatsApp message types and the 24 hour rule … as this is slightly different to some social platforms. We have two types of WhatsApp messages. Template messages and Session messages.

Template messages are outbound messages, these are transactional messages with a pre-approved format. (For example: “Your order has been dispatched”.) They can only be sent to users who have opted to receive messages from your organization. In this post I am going to concentrate on incoming messages! I might return to more detail around outbound / transactional messages in a later post. (As we can now send outbound SMS and WhatsApp messages!)

Session messages are messages that are incoming messages from a customer. The session would include the incoming messages and any subsequent outgoing replies. Sessions last for a maximum of 24 hours from the most recently received incoming message. Therefore WhatsApp conversations, unlike say SMS conversations only last for 24 hours and cannot continue over several days (or weeks) as could happen with SMS. Outside of the 24 hours, for an agent to re-engage with a customer they’d need to send a template message.

Prerequisites

As WhatsApp integration is delivered using Twilio we first need a Twilio account and number. I explain how to setup a Twilio account and configure the SMS channel in this post.

Note: Currently Microsoft only support US Twilio phone numbers.

Now before you think about configuring the WhatsApp channel it makes sense to check that you are on the latest version of Omnichannel. Below you can see that in the Dynamics 365 administration center I checked that my sandbox was up to date. It wasn’t! So my first step was to apply the upgrade. Applying an upgrade can be a lengthy process. So whilst that happened I had plenty of time to read up on the install process. You can find Microsoft’s documentation on the WhatsApp channel here.

WhatsApp channel Setup steps ….

  1. Connect Twilio number to WhatsApp
  2. Copy Twilio Details
  3. Create WhatsApp Channel
  4. Add WhatsApp number into Omnichannel
  5. Validate your setup

Step One – Connect Twilio Number to WhatsApp

If you haven’t done so already your first step will be to connect your Twilio account to WhatsApp. The steps involved in connecting Twilio to WhatsApp are;

  1. Request access to enable your Twilio numbers for WhatsApp
  2. Submit a WhatsApp sender request to the Twilio console
  3. Approve Twilio messages on your behalf in the Facebook Business Manager console.
  4. Submit your Facebook Business Manager account for Business Verification
  5. Twilio completes your WhatsApp sender registration.

Simples!! Confused? You can read about this process in detail here.

Note:
You will need a Facebook Business Manager ID to be able to request authorizing Twilio/ If you don’t have a Facebook business manager account already you can use this link to create one!

I won’t describe each of the above steps in massive detail. (The link I have provided does that!) But I will give some pointers.

Once I had created a Facebook business manager submitting the request to enable my numbers was simple enough. But you do have to wait for an email to arrive. That took a few days. And in my case I did have to create a support ticket with Twilio! But they did help me out pretty quickly.

After successfully completing step one and requesting your number is enabled for WhatsApp you should receive an email giving you the next steps. (Which involves starting the process to setup a WhatsApp sender in Twilio.) The steps are easy to follow! But I did notice the comment below in my pre-approval email. This isn’t a quick process!!

Once you have the pre-approval email from Twilio you are ready to enable a WhatsApp sender. For this you open the programmable messaging section in your Twilio portal. Here you will find a WhatsApp senders section. After I requested that my Twilio number be added as a WhatsApp sender I needed to wait again for approval.

Next you will get another email from Twilio. This time you need to approve messages being sent on behalf of WhatsApp. You can see below that you complete this approval in your Facebook business account.


At the same time you will need to ensure that your business is verified with Facebook.


This process of business verification and connecting Twilio can be lengthy! I really wanted to say the process was straight forward but I actually needed several support tickets with Twilio. I also ended up completing the business verification with Facebook several times. (Maybe the documents I supplied to verify my business address weren’t ideal!)

Eventually WhatsApp was correctly setup in Twilio …. you can see below that under programmable messaging my number has been approved by WhatsApp.

Step Two – Copy Twilio Details

As you set up the WhatsApp channel in Omnichannel for Customer Service you will need your Twilio Account SID and Auth token. These can be found on the first page of your dashboard in the Twilio account portal. (As shown below.)

Step Three – Create WhatsApp Channel

You are now ready to create the WhatsApp channel in Omnichannel for Customer Service. In the Omnichannel Administration app find the WhatsApp option in the channels section and use the “New” button to create a WhatsApp channel.

Toi create your WhatsApp channel you will need to give the channel a name and then enter your Twilio account SID and Auth token. (copied in previous step!)

Once you click save a Twilio inbound URL will be generated.

Now you need to return to your Twilio console. And in the WhatsApp senders option enter the Twilio inbound URL. (Your Twilio number must be approved as a WhatsApp sender before attempting this step!)

Below you can see that I have entered by Twilio inbound url into my WhatsApp sender within the Twilio portal.

Step Four – Add WhatsApp number into Omnichannel

In your WhatsApp channel you can now enter your WhatsApp phone number.

Below you can see that I’d sued the “+ New WhatsApp number” within my WhatsApp channel in the Omnichannel Administration app.

Below you can see the details for my phone number. Notice I have selected the WhatsApp workstream. (In which I will have also defined any routing rules that I needed.)

I also navigated to the general settings tba and enabled the file attachments options. These are optional but I guess you will probably want to support swapping attachments with your customers.

Step Five – Validate your setup

Your final step is to validate your setup. Below you can see that I used the validate option in the Validation section of my WhatsApp channel.

Test

Finally in my WhatsApp mobile app I created a new contact including the phone number I’d created. And when I sent a message into this account I received the expected notification within Omnichannel for Customer Service

Accepting the conversation allowed the conversation to begin in Omnichannel. And as I’d set the option to enable file attachments these could be sent within the conversation.

Conclusion

The setup process for the WhatsApp channel was not easy! But to be fair all of my challenges seemed to be connected with authorising my Twilio phone number for use with WhatsApp.

Once the process to approve my Twilio number for WhatsApp was completed making the number operate within Omnichannel for Customer Service was a pretty quick and easy process.

I can now receive inbound conversations from customers using WhatsApp. Next it is likely that I will also want to start outbound conversations with my customers. For that I will need some approved outbound WhatsApp message templates. I will dig into the process for configuring outbound WhatsApp messages in a future post!

Power Platform Birmingham – Amazing Free January Event

$
0
0

Our next exciting Dynamics 365 Birmingham User Group meeting will be taking place on Wednesday 20th Jan 2021 at 5:30pm, and we would love to see you!

We hope to see our local friends. But being virtual EVERYONE will be very welcome!!

NOTE:
We plan to repeat the successful format used at our previous events! Meaning we’ll keep our presentations short and sweet. Plus we’ll kick off just after work at 5:30pm. You will also get a chance at the end of each presentation to ask questions or make comments.

If you haven’t registered yet the event is open to anyone and is free to attend.

You can register on meetup here …

D365UG Birmingham – Wednesday 20th January 2021 5:30pm | Meetup

Agenda

Emma D’Arcy
The Center of Excellence – What you need to know

In this session Emma D’arcy will do a deep dive into the Center of Excellence from what it is, why it’s important, how to implement it and lessons learned from a real world implementation scenario!


Alison Mulligan
Your career is your responsibility

Alison Mulligan will present … Why it is important for you to build your own career development strategy, and how to get started on yours.

Alison’s presentation will be a short one! But afterwards you’ll be able to stay and discuss your career thoughts with Alison. So come armed with questions!!! What better time than early in the New Year to consider your career development???

After the sessions, we hope you’ll stay with us to socialise and share your anecdotes on what you’ve been up to?

If you haven’t registered yet the event is open to anyone and is free to attend.

You can register on meetup here …

D365UG Birmingham – Wednesday 20th January 2021 5:30pm | Meetup

Omnichannel for Customer Service – Insights Dashboards

$
0
0

Within Omnichannel for Customer Service we can enable Power BI based dashboards to give insights into your customer communications across all your messaging channels. In this post I will review how to enable these dashboards and what information your supervisors will then be able to view.

We actually have two types of supervisor dashboards. The first are the intraday statistics. These are refreshed every 15 minutes and shows a snapshot of KPIs relating to recent conversations. We have two intraday insights dashboards, one shows details for conversation totals across all channels and the other gives information which is agent specific. (The agent dashboard can also allow the supervisor to see the current agent presence and even update it directly from the dashboard.)

We also have additional insights dashboards which give a deeper analysis of conversations over a longer period. In this post I will be describing these “historic” insights dashboards. But you may also benefit from looking into the intraday insights. (I might cover those in more detail in a future post!)

Note: You will need a Power BI Pro license to be able to install the Omnichannel Insights app.

You will find Microsoft’s install instructions and full details of additional prerequisites here.

The install steps are as follows;

  1. Ensure embedding Power BI reports in Dynamics 365 customer service is enabled
  2. Enable sentiment reporting
  3. Install Omnichannel Insights for Dynamics 365 app
  4. Connect to Omnichannel Insights app
  5. Set the refresh frequency on your dataset
  6. Publish your application
  7. Add Power BI dashboards to Omnichannel for Customer Service

Note: There are quite a few steps to the setup process. But stick with it as each step is pretty simple, so you shouldn’t have many problems completing this.

Step One – Ensure embedding Power BI reports in Dynamics 365 customer service is enabled

In the power platform admin center, select your instance and then within the settings option open the “Features” option.

Below you can see that my “Power BI Visualization embedding” setting is enabled.

Step Two – Enable sentiment reporting

You need to ensure that “sentiment drivers reporting” is enabled within Omnichannel.

Before doing this also confirm that change tracking is enabled on the conversation sentiment entity. (Note: Mine was enabled already but it is worth checking!)

Below you can see that on the properties tab for the conversation sentiment entity I have change tracking enabled. Don’t forget that it you change this option you’ll need to publish the change!

Then within the Omnichannel Administration app, open the sentiment analysis settings option. In here you will find an option to “report sentiment drivers in Omnichannel Insights”. You will need to confirm this is enabled.

Step Three – Install Omnichannel Insights for Dynamics 365 app

As an administrator open Power BI. Then use the “Get Data” option to choose the Omnichannel insights app.

Below you can see that I have searched for “Omnichannel”. The Omnichannel insights app has been found and I can select it.

I now open the app and select “GET IT NOW”.

Assuming you are happy to continue that click “Install”

The app will now install. It only takes a few moments!

Once complete you will see the Omnichannel Insights app within Power BI.

Step Four – Connect to Omnichannel Insights app

Now we need to connect the insights app with your Omnichannel for Customer Service instance.

When you first open your Power BI Omnichannel insights app you will see that all the data is blank. Notice the notification which says “You’re viewing this app with sample data”. Click the “connect you data” option next to this message.

Next you enter your Dynamics 365 service root URL and click next.

Tip:
If you don’t know what this URL is check out the customizations option in your advanced settings. And look for the developer resource option as within here you’ll find details about your instance, including this URL.

Next I set my privacy level to “Organizational” and clicked sign in and connect.

Step Five – Set the refresh frequency on your dataset

Your next set will be to set the frequency to refresh your data. This is a simple process which allows us to ensure the data is automatically refreshed daily.

Within Power BI find the datasets option, then on your Omnichannel Insights for Dynamics 365 dataset click “…” and select the settings option.

Within the settings, expand the “schedule refresh” section. And check that the keep you data up to date option is selected and the frequency is set top daily.

Step Six – Publish your application

You must now share the Power BI application with your entire organization, this is required for supervisors to be able to view the Omnichannel Insights dashboards and reports.

Below you can see that I have selected my app workspace. I then click the “Update app” button.

Finally, navigate to the “Permissions” tab and select the “Entire organization” option. Then click update app.

Step Seven – Add Power BI dashboards to Omnichannel for Customer Service

We are now ready to configure Dynamics 365 so that the supervisors can see the Omnichannel insights and sentiment analysis dashboards.

Each supervisor will need to add the sentiment and insights dashboards. Therefore from the dashboards option that will select New and then select Power BI.

Each supervisor can then the omnichannel insights workspace and insights dashboard.

Assuming they require the sentiment dashboard as well as the insights dashboard then they will need to also select the sentiment analysis dashboard.

Once completed the supervisor will have two dashboards that can be selected.

Dashboards

Ok … so now you have two dashboards but what information can you expect to see? In this final section I will describe the key elements of each dashboard. I might not cover everything just the key information!

Obviously the best thing to do is configure the dashboards and see what you actual data look like. But in this section I will try to highlight some of the insights I found most interesting. I will also comment on what actions I completed in my tests to generate this data!

Let’s start by looking at the Insights dashboard ….

Omnichannel Insights for Dynamics 365

The insights dashboard gives you an overview of activity. The top section of the dashboard contains some useful cards that tell me how many conversations have happened etc.

Notice I have 17 incoming conversations but only 16 have been engaged with. This is because I had one conversation that the customer started but no agents accepted.

As Microsoft’s documentation described the abandon rate is the percentage of conversations that are not engaged by agents I was surprised to see that it initially remained at 0%. I did some further tests when I did see the abandon rate change. I think an abandoned conversation is one that is never routed to an agent. Maybe the customer shuts the chat widget almost immediately or maybe no agents are available so the customer aborts before the conversation can be routed. Whereas conversations that are routed but the agents don’t converse with the customer seem to show in the difference between incoming conversations and engaged conversations. But don’t count as abandoned.

I mention abandon rates as in my experience this is a KPI which the supervisors may wish to keep a close eye on. Therefore understanding its meaning maybe important. An increase in customers abandoning conversations before they connect with an agent might suggest you need more agents!

My average wait time was pretty low as generally speaking I connected with each test customer straight away. And being a test system meant I didn’t have a large volume of live customers engaging concurrently!

I did simulate one agent transferring a conversation to another agent. Hence I have a transfer rate.

Below these initial tiles I get a chart showing the number of conversations by day for the last 15 days. Plus charts show the average wait timer per day, average length of conversations and transfer rates per day.

One tip I have here is that you might want to open the dashboard up in Power BI directly. As the date range for these charts could be tweaked. (As shown below.)

I also see a useful chart which gives me an average score from my sentiment analysis. Although if you want to dig deeper into sentiment analysis then the sentiment dashboard will give you more information. (I will mention that later in this post.)

I then get a bunch of charts showing me the conversation stats by channel and queue. I found it especially useful to see how many conversations I’d taken on say Twitter compared to WhatsApp. Etc.

Next I see similar information but by agent. In my test I had just two agents. Me and my dog! But I hope you can see that being able to see how many conversations had been taken by each agent could be really useful.

Tip: One agent handling more conversations than another could in theory flag a management concern. But equally it might be highlighting that due to agent skills based routing and capacity you have a tendency to route conversations to particular agents. So these stats may give you some clues on how your Omnichannel routing can be improved. In my example I found my agent had a much higher capacity than any other agent and therefore the conversations were not routed evenly across my agents.

The final group of charts showed me BOT conversations, including details of resolution rates and escalation rates. I think it would be really useful to understand how many BOT conversations get escalated to humans!

Sentiment Analysis Dashboard

Next I looked at the sentiment analysis dashboard. I found this one really interesting!

The first tile on the sentiment analysis dashboard shows us the average sentiment pulse we saw this on the omnichannel insights dashboard! But we also have a chart showing the sentiment zones, this gives a sense of what percentage of conversations fall into negative, neutral or positive rankings.

This pulse is then further split down by type of agent (aka human or BOT) and channel. For example, In my test data conversations one Twitter seemed to be more positive than live chat.

I only had a couple of test agents but I next see some charts that show me sentiment scores by agent (for the agents obtaining the lowest and highest scores).

Beyond this I see sentiment by queue and also channel (by day).

I hope you agree that enabling these insights is quite straight forward and we can view loads of useful information about our conversation volumes and sentiment. Enjoy.

Omnichannel for Customer Service – Twilio for SMS

$
0
0

Microsoft’s Omnichannel for Customer Service supports two providers for sending SMS, Telesign and Twilio. I have already described the process for Telesign in another post. In this post we will look at how to configure SMS using Twilio.

You can view my post on general SMS setup and eth Telesign process here.

Note: If you wish to use the WhatsApp channel then a Twilio account will also be needed. Therefore you may also wish to investigate that option … for WhatsApp!

The steps involving in setting up Twilio SMS are as follows;

  1. Create Twilio Account
  2. Get Twilio Number
  3. Create Twilio workstream in Omnichannel for Customer Service
  4. Create connection between Omnichannel and Twilio

Step One – Create Twilio Account

Your first step will be to create a Twilio account, go to www.twilio.com. And sign up.

Initially you will need to enter your personal details to sign up for a free Twilio account. (I am confident the nice people at Twilio will start asking me for money later if I start using their service!)

To start your free trial there will be a verification process. Meaning you do need to be a human to sign up for a Twilio account!

Next I was asked a couple of questions which help tailor my experience. Obviously I am not 100% sure on what effect giving different answers might have had. But I clicked the buttons to say I wanted to use Twilio with a different service. It then asked me which service and as Dynamics 365 wasn’t listed I clicked “other”.

After this was completed my Twilio account opened and I was ready to progress. Usinfully the trial has given me £12 credit. I assume that will be enough to get me going but I guess I’ll need to apply a credit to my account later!

Step Two – Get a Twilio Number

Now I have a Twilio account I will need a Twilio phone number.

I clicked get a phone number!

It offered me a US number capable of voice, SMS and MMS. I didn’t need voice but decided to accept it anyway.

I also stuck with the US number! I did this as I’d seem a not somewhere about only US phone numbers being supported with Omnichannel for Customer Service.

Before you can see that I was offered a number. I just clicked “Choose this Number”. I felt this was fine for my initial trial and assumed I could probably add another number later if I decided I didn’t like this one.

Having obtained my number I progressed to getting my account SID. I copied this as I assumed I’d need it later!

Tip: You will also need to copy for auth token. Which can be found on your dashboard!

And finally I had the option a add a payment method. I assumed that maybe I could have continued at this point and just used my £12 trial balance. But I decided I wanted to keep this number so opted to upgrade my account.

I won’t show this bit …. Having clicked upgrade, I entered my credit card details!! But afterwards I had secured my number by adding £20 to my account.

At this point I wanted to prove my number was working! So I sent it an SMS.

The message was sent I and I received an automated reply telling me I needed to configure my numbers SMS URL!

Below you can see that in the Twilio portal I could open the “Programmable Messaging” option. In here I can see the messaging dashboard and my incoming message showed.

Step Three – Create Twilio workstream in Omnichannel for Customer Service

Once I had my number it was time to setup the Omnichannel side of things. The first step of which is to create a workstream. So I loaded the Omnichannel Administration app and in the work streams option I selected the “New” option.

First of all I entered a name for my work stream, so “Twilio Work Stream”. Next I selected SMS as the channel and made sure the auto-close after inactivity field had a value of anything greater than 24 hours. (The default was 2 days, so I started off with that.)

Next in the SMS tab, I entered my account SID and auth tocken. (I’d copied these earlier when I created my Twilio phone number.)

Then I clicked save!

Next, in the SMS numbers tab I added my SMS number. You can see the details below. I also entered my opening hours and enabled file attachments.

Now I was ready to validate my SMS settings. You can see below that I clicked the “Validate SMS Settings” option from the ribbon bar.

After just a couple of seconds I received a message that my SMS API details had been successfully validated.


Now at this point I would probably need to define some routing rules to decide which queue to route my messages into. However in my initial simple test I left my routing rules blank! As doing that will route o my default messaging queue. Which was just fine for my test!!

Step Four – Create connection between Omnichannel and Twilio

Now we need to connect Omnichannel and Twilio. First of all you will need the Twilio inbound URL that was generated when you saved your SMS settings in Omnichannel for Customer Service. So go to you SMS settings and copy that.


Next I returned to the Twilio website and located the phone numbers option. Here I could see my active phone numbers.


Clicking on my phone number opened its settings. I scrolled down the screen and in the messaging section I added the URL I’d copied from the Omnichannel Administration app.


Step Five – Test

I now waited 15 minutes! Something that is always good with Omnichannel changes as most take 15 minutes to apply.

After I’d had a cup of coffee …. I sent a text message to my Twilio number. Whilst my agent was in the Omnichannel for Customer Service app with their agent dashboard displayed.

As you can see I was notified for the incoming SMS within Omnichannel for Customer Service. From that point onwards my newly created Twilio SMS channel behaved the same as any of my other channels.


All in all configuring Twilio SMS was a pretty straight forward process. There were a few steps to follow but essentially everything worked as expected. Enjoy!

MB 600: Microsoft Dynamics 365 + Power Platform Solution Architect – Lead design process (Part One)

$
0
0

I am currently preparing to take the Microsoft Dynamics 365 + Power Platform Solution Architect certification. Or “MB 600” for short! As I prepare I plan to write revision notes in this post I will cover leading the design process.

A Dynamics 365 / Power Platform Solution architect needs to lead successful implementations, meaning the architect is a key member of the project team. They must demonstrate functional and technical knowledge of Power Platform and Dynamics 365 apps. And beyond that they must appreciate other related technologies that form part of the overall architecture.

This section of the exam is pretty large! I therefore plan to split this information into three posts. This post, therefore is just the first part.

When we look at this section of the skills measured for the MB 600 exam, I hope you can see that its coverage is quite wide. I also think it is true to say that there is a lot of implied knowledge in many of these subject areas. In my revision notes I will try to cover as much information as I can. But like so many sections of this exam your real-world experience is all important. So I suggest you do reflect on your current and past projects. Think deeply about how you have been involved in the design process and try to consider how this experience relates to the headings below.

In this post I will try to tackle topics under the following headings;

  • Design solution topology
  • Design customizations for Dynamics 365 apps or AppSource apps
  • Validate and/or design user experience prototypes

Design solution topology

The phrase “topology” suggests defining the shape of either the physical or logical design of the solution. This might mean drawing out a business process or creating a diagram to show how the solution components will interact. Or maybe a diagram to show the logical or physical data structures. These diagrams could be considered as the blueprints for the solution. The blueprints provide a visualization of the organisational processes or system components that make up your application. It will often be true that the Solution Design Document (SDD) will contain several blueprints to map requirements to implementation components.

Visualizations used in the creation of a design may include process models, data models and even wireframes showing the user experience.

A single design framework or blueprint obviously does not exist. But there are several principles (pillars) we can expect to be addressed by a well architected solution, including;

Security

A customer’s data is valuable and must be protected from vulnerabilities. We might need to consider the Dynamics 365 security model here but also other features like Azure Conditional Access and Data Loss Prevention polices. A Solution Architect should think about security throughout the entire life cycle of the application. Security includes perimeter control and security model to protect data.

Empowering end users

A Power Platform solution should empower users to be able to extend the application. This may involve providing user-focused connectors or creating reusable Power App components. Additionally we might create app templates or starter apps. Additionally establishing a centre of excellence using the Microsoft provided starter kit may help encourage user empowerment.

Trust and privacy

Compliance requirements and regulations may differ from industry to industry, project to project or maybe even across geographic locations. (For example the rules for data privacy in Europe may differ from those found in the US.) The Solution Architect must recognise these requirements and incorporate them into their designs. Microsoft publishes a trust center that Solution Architects should be aware of.

Maintainability

Maintaining custom code is more expensive that features delivered with simply low-code configurations to out of the box features. Additionally Dynamics 365 and the Power Platform are updated frequently. Therefore the Solution Architect should design solutions which are as easy to maintain as possible and created in such a way that the regular updates do not break the solution. Additionally the Architect should be responsible for ensuring the correct level of documentation is created so that future maintenance is easier.

Availability and recoverability

When a system fails we need to know it can be recovered! The Architect will need to be aware of any expectations on recovery time required by the customer / stake holders. Integrations across system boundaries should receive special attention. We need to avoid the failure of one system component from causing the entire solution to fail. Additionally the Architect should consider and recommend solutions / tools to allow on-going monitoring to help give warnings of issues and allow early reactions to problems.

Performance and scalability

The Solution Architect needs to be aware of any expectations on resource capacity. The Architect needs to support the operations team identify the capacity / responsiveness that is required to support the components that much up the solution.

Efficiency and operations

A monitoring framework maybe needed to ensure visibility of how the application is using resources. We will want to drive up quality, speed and efficiency. Whilst at the same time driving down costs. When considering cloud solutions in will be of particular importance that the system is efficient. As inefficiency and waste in cloud solutions could result in excessive costs.

Shared responsibility

A cloud architecture introduces a concept of share responsibility. Your cloud provider (e.g. Microsoft) will manager certain aspects of the application leaving “you” with the remaining responsibility. The nature of this shared responsibility will have implications on costs, operational capabilities, security and even the technical capabilities of the application. The “bonus” is by shifting responsibility for some of these features to the cloud provide you enable the customer to focus on other activities more core to their business function.

Design choices

Based on these design pillars the Architect should rightly want to build applications that are as secure, available, efficient and performant as possible. BUT, trade-offs come into play! Building the ultimate system comes with “costs” in terms of cash, delivery time and operational agility. Depending on the customer’s requirements design decisions will be needed to deliver a quality application but also one that meets any goals set regarding these costs.

Design customizations for Dynamics 365 apps or AppSource apps

When we consider the target architecture as a Dynamics 365 and Power Platform Solution Architect we are often referring to the Dynamics 365 apps, Power Platform components and other parts of the Microsoft stack. (As shown in the diagram below.) Meaning that ideally a Solution Architect should be aware of and use the full capabilities across the Microsoft stack.

AppSource can be a useful source for solutions that will fill particular horizonal features within the overall solution. For example, you may be able to leverage 3rd party solutions for things like document management, CTI etc etc.

The Power Platform components are designed to work well together. Therefore the Solution Architect should leverage the strengths of the platform in the solution design. But also consider the right time to use Microsoft Azure to fill any gaps where the platforms capabilities are exceeded. Pushing the Power Platform beyond its “natural” capabilities and using unsupported customization techniques should be avoided. The Power Platform is made up of the following components;

  • Power BI– helps people harness data into actionable insights. Connects to hundreds of data sources. Provides dashboards and tiles used to create visualizations which can be embedded into Power Apps. (Additionally Power Apps can be embedded into Power BI dashboards.
  • Power Apps– There are three types of PowerApps.
    • Canvas Apps– allows the creation of an app from a canvas without writing code.
    • Model-driven Apps– component-focused approach to app development. Can be used to create complex apps without code. Much of the layout of a model driven app is determined for you and often has a focus on the entities within the app.
    • Portals – allows the creation of a website that can surface CDS data. Allowing both internal and external stakeholders to view and update CDS data.
  • Power Automate– allows everyone from end users to experts to create automation flows. (Both UI-based automation and API-based.)
  • Data Connectors– data can be brought into an app via a data connector. Many connectors exist to access data in popular data sources. Including SharePoint, SQL Server, Microsoft 365, Salesforce, Twitter and many more. Some connectors only provide tables of data but others expose actions. When standard connectors don’t exist custom connectors can be created.
  • AI Builder– an approach to bring AI to every organization. Provides pre-trained and trainable models.
  • Common Data Service– lest you store and manage data. Includes the common data model which is a base set of standard entities that cover typical scenarios.
  • Power Virtual Agents– an easy to use solution to create virtual agents (bots).

When considering reporting / visualizations of data it may be useful to leverage pre-built insights including;

  • Dynamics 365 Sales Insights
  • Dynamics 365 Customer Insights
  • Dynamics 365 Market Insights
  • Dynamics 365 Virtual Agents for Customer Service
  • Dynamics 365 Customer Service Insights
  • Dynamics 365 Fraud Protection

Validate and/or design user experience prototypes

As mentioned elsewhere the Solution Architect is responsible for identifying when a proof of concept (POC) solution may be required to help validate the design. Maybe a POC is required to confirm if a particular technical solution is workable. Or maybe to test if the users prefer a model-driven app or a canvas app etc.

Note: It should be understood that sometimes the architect may build these proof of concept / prototype solutions. But this is not a given. Sometimes the Architect will “simply” identify the need and other developers will create the required components.

Additionally it might be that screen mock-ups will be created to help the customer visualise the expected final solution.

Architects who have traditionally worked with model-driven apps may find they haven’t routinely needed to create mock-up designs for screens, as historically the layout of a model-driven app has been “fairly fixed”. But with the advent of custom components (PCF) and Canvas Apps we now have the capability to create “richer” user experiences. And therefore the need to validate the user experience will have increased.

Tip:
The above may also be true for Portals. When the look and feel that will be experienced by the customer will be paramount.

When an application is being developed iteratively in an agile manner, I have found it useful to complete frequent “show and tell” sessions. I have found it useful to show the customer the user interface and gain feedback as early as possible in each iteration.

Viewing all 1692 articles
Browse latest View live


<script src="https://jsc.adskeeper.com/r/s/rssing.com.1596347.js" async> </script>